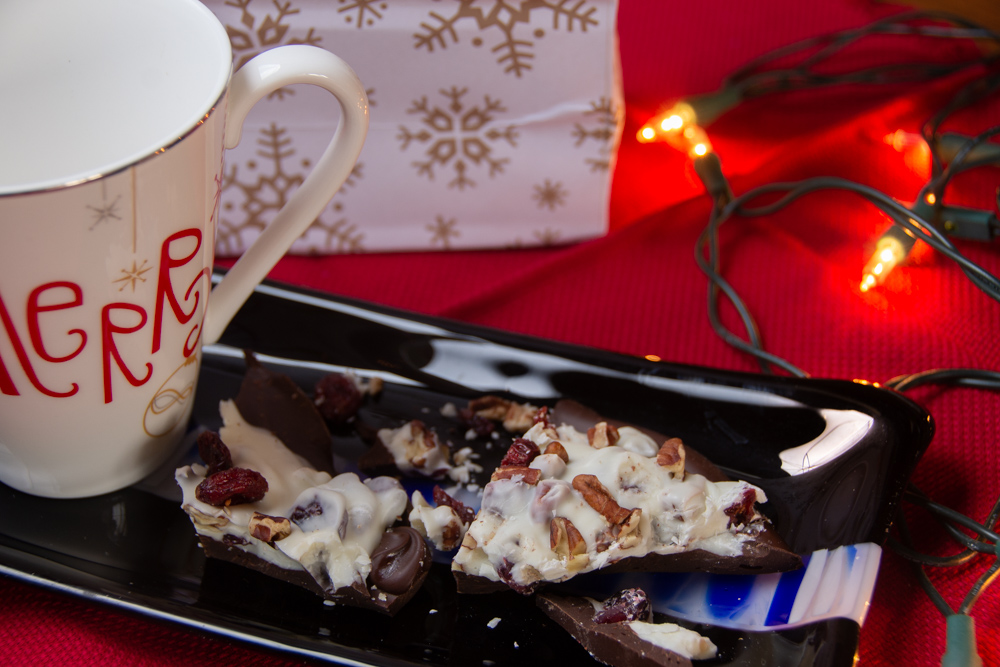
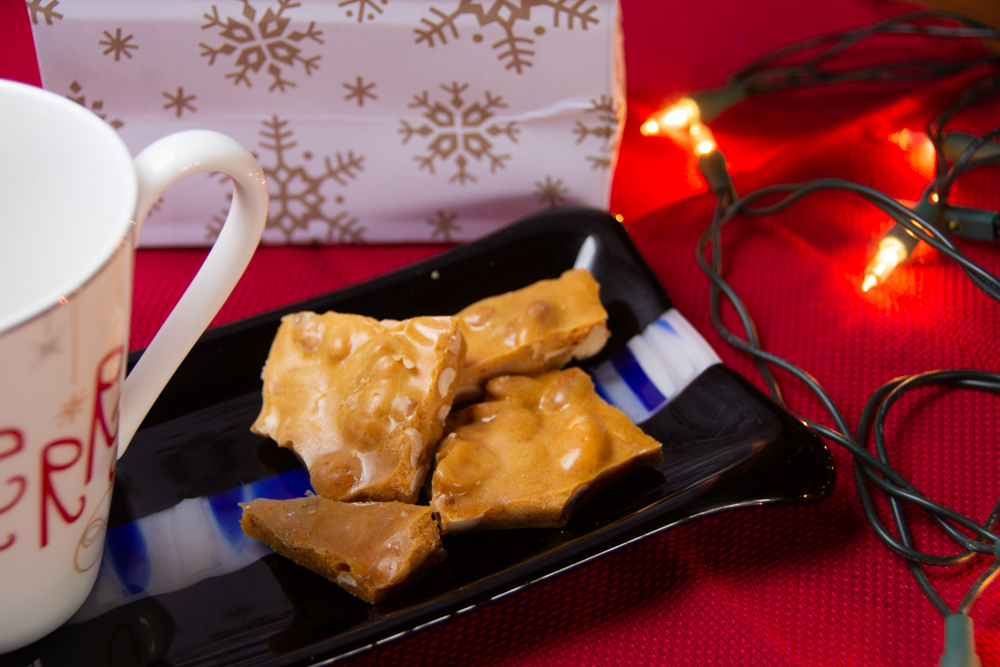
• I remember tins of peanut brittle although I don’t remember exactly where they came from so when King Arthur Baking sent out this Microwave Nut Brittle recipe in a weekly email blast, it seemed like an opportunity to try something from long-ago memory.

    When I think of handmade gifts for giving at the holidays, I’ve shied away from making nut brittle, especially now, as I don’t do enough candy-making to warrant having a candy thermometer in my tool drawer. Also, the making part of this involves corn syrup, something I don’t often keep in the pantry.

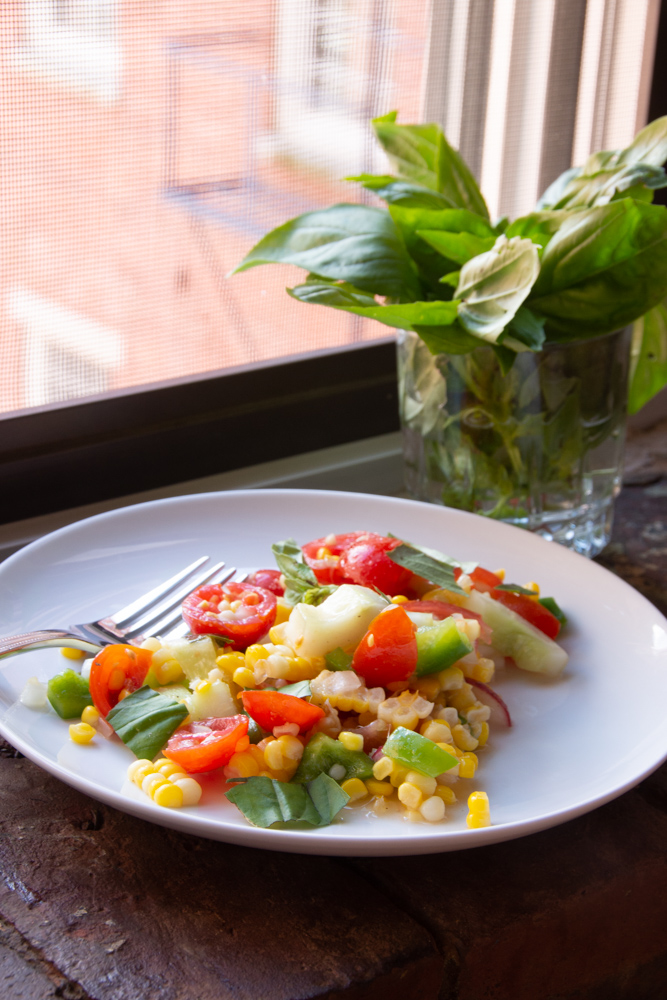
    With a thought that perhaps COVID lockdowns are making me a bit nostalgic, I decided to give this candy a try. It looks similar to the peanut brittle we used to get out of those tins and by preparing it with a microwave, it seemed pretty easy to pull off. The original post on King Arthur’s website contains nutritional information.

    King Arthur Baking Microwave Nut Brittle

    Ingredients

    • 1 cup (198g) granulated sugar
    • 1/2 cup (156g) light corn syrup
    • 1 1/2 cups (213g) salted peanuts
    • 1 tablespoon (14g) butter
    • 1 teaspoon baking soda
    • 1 teaspoon vanilla extract

    Method

    1. Spray a wooden spoon (or other heat-proof stirring implement) with non-stick cooking spray. Lightly grease a 10″ x 15″ or larger baking sheet, or line it with parchment.
    2. Mix together the sugar and corn syrup in a large microwave-safe bowl and stir until well combined; the mixture will be stiff and hard to stir. Be sure to use a large enough bowl; the sugar/corn syrup should fill it no more than 1/4 to 1/3 full.
    3. Microwave the sugar mixture uncovered on high power for 5 minutes; it will bubble vigorously.
    4. Add the peanuts and butter, and stir well to combine. Speed is key! The cooler the mixture becomes the harder it will be to stir.
    5. Replace the bowl in the microwave and cook on high for 2 to 4 minutes, until the mixture turns a nice medium-brown caramel color. Start watching carefully around the 2-minute mark, and remove when the caramel color is achieved. (I found 2 minutes to be the right timing)
    6. Add the baking soda and vanilla. The mixture will bubble furiously upon the addition of these ingredients — this is what gives the candy its hallmark airy texture. (This is also why you need to use a large bowl.) Stir quickly to combine. The finished mixture will look creamy and caramelized.
    7. Working quickly, pour the mixture onto your prepared baking sheet and spread it as evenly as possible. If you end up with an uneven spread, don’t worry — the candy should still set up nicely, even in the thicker areas.
    8. Once the brittle has set and cooled (30 to 60 minutes), break it into pieces.
  • And just like that, it’s time to start Holiday Baking again. This year, I’ve made fewer cookies, and included some other confections in my repertoire. King Arthur Baking share a couple of recipes over the last week that I am working on for family and friend homemade gifts. The contrast of cranberries, roasted pecans, and sweet chocolate, easy and quick way it comes together and a decent yield (2 dozen pieces) makes it a keeper! Visit the KAB recipe post for the nutritional information – and why spoil such a good treat, but there you have it.

    Cranberry Nut Chocolate Bark from King Arthur Baking

    Ingredients

    • 1 cup dried cranberries
    • 3/4 cup toasted, diced pecans
    • 2 2/3 cup chopped semi-sweet or bitter sweet chocolate, melted
    • 2 2/3 cup chopped white chocolate, melted.

    Method

    1. Toss the cranberries and pecans together. Set aside.
    2. Melt the dark chocolate and spread it into and 8″ x 12″ oval on parchment paper.
    3. Allow the chocolate to set, but not harden completely.
    4. Melt the white chocolate and mix it with about 3/4 cup of the cranberries and pecans.
    5. Spread the cranberry/nut/white chocolate over the dark chocolate.
    6. Sprinkle the rest of the nuts and fruit on top, pressing them in gently.
    7. Allow the candy to cool until hardened, then break it into chunks.
  • I’ve discovered Skinny Taste as a great resource for when I don’t want to bother with trying to adjust higher calorie recipes for something to eat. This quiche – crustless no less – came together beautifully and at 174 calories per serving, it’s a winner for breakfast, lunch, or a late dinner.

    Crustless Broccoli & Cheddar Quiche from Skinny Taste

    Ingredients:

    • Cooking Spray (I used coconut oil)
    • 3 cups chopped broccoli florets
    • 1 cup grated cheddar cheese
    • 2/3 cup 2% milk
    • 1/4 cup half and half cream
    • 5 large eggs
    • 3/4 tsp. kosher salt
    • 1/8 tsp. ground black pepper
    • pinch of freshly grated nutmeg

    Method

    1. Preheat oven to 350 degrees. Spray a pie dish with oil.
    2. Steam the chopped broccoli florets in the microwave with 1 TBSP water until tender crip and green but not mushy – about 2 1/2 to 3 minutes.
    3. Evenly spread the broccoli in the dish and top it evenly with the grated cheddar cheese.
    4. Make the custad mixture by whisking together the milk, half and half, eggs, salt, pepper, and nutmeg. Pour the custard into the dish and bake 35 to 40 minutes until the center is set.
    5. Cut the quiche into 6 pieces and serve.

    Nutrition information found on the recipe website.

  • The New York Times has an extensive recipe collection that I’ve often used when looking for ideas for cooking. If you have a subscription to the Times, the recipe box feature is worth the price of a NYT subscription, and their newsletter, What to Cook This Week, is an extraordinary resource.

    With cooler Fall temperatures setting in, this week I’ve begun to put more soups and stews into our meal-planning rotations. With some beautiful carrots and a fennel bulb in our CSA Share, this recipe for Carrot-and-Fennel Soup from Amanda Hesser was truly serendipitous.

    I did make a modification by substituting 0% Greek Yogurt for Sour Cream which didn’t feel as if it impacted the texture or flavor.

    Carrot-and-Fennel Soup (Amanda Hesser)

    Ingredients

    • 2 TBSP unsalted butter
    • 1 medium fennel bulb, trimmed and thinly sliced, fronds reserved
    • 1 1/2 pounds carrots, peeled and thinly sliced
    • 1 large garlic clove, thinly sliced
    • 1 tsp salt (or to taste)
    • 1/2 cup fresh orange juice
    • 1/2 cup sour cream (I subbed in 0% Greek Yogurt)
    • Freshly ground black pepper

    Method

    1. In a 3 quart heavy saucepan, over medium heat, melt the butter until foamy. Add the fennel slices and cook, stirring, until softened.
    2. Add the carrots and garlic and cook another minute.
    3. Pour in 6 cups of water and season with salt. Simmer, covered, until the carrots are very tender, about 20 minutes.
    4. Remove the soup from the heat and stir in the orange juice, sour cream and reserved fennel fronds. Use the back of a spoon to mash some of the carrots and fennel, but leave the soup chunky.
    5. Season with salt and pepper.

    Noomers: full nutritional information on the NYT recipe website. Calories = 120 (for 1/6 of the recipe)

  • We’re nearing the end of our 20-week Summer CSA and finding more Fall veggies in our share. This week, we were introduced to a new one: Romanesco. To me, it’s odd shape and more nutty flavor reminded me of cauliflower, but it seemed to hold up better in cooking. Not sure how to deal with prepping this vegetable? A Beautiful Plate, the source for this recipe, has a great how-to.

    Romanesco Cauliflower Pasta with Olives, Capers & Parsley, from A Beautiful Plate

    Yield 4 servings (428 calories)

    Ingredients

    • 1 head of Romanesco (or cauliflower)
    • 2 TBSP extra virgin olive oil (divided)
    • kosher salt
    • freshly ground black pepper
    • 3 large cloves garlic, finely chopped
    • 1/2 heaping cut pitted kalamata olives, sliced lengthwise
    • 2 TBSP capers, roughly chopped
    • large pinch red pepper flakes
    • 1 heaping cup chopped Italian parsley leaves, lightly packed (more for garnishing)
    • 1 lb dried linguini or fettucine pasta (we ended up needing only half pound)
    • freshly grated parmigiano-reggiano cheese for serving (optional)

    Method

    1. Preheat oven to 450 degrees F with rack in center position.
    2. Trim and discard the base of the Romanesco and cut it in half, then quarters. Standing each quarter upright & holding your knife at an angle, trim the florets from the core. Most of the florets will fall off or can easily be separated with your fingers (you want the florets to be no larger than an inch in diameter); cut any larger florets in half with a knife to match the size of the other florets.
    3. Place the florets on a half-sheet pan and toss with 1 TBSP of olive oil, kosher salt & freshly ground pepper. Distribute the florets, cut-side down, into an even layer, making sure the florets aren’t touching each other if possible. Roast at 450 degrees for 15 to 20 minutes, tossing halfway, or until carmelized and tender.
    4. Meanwhile, bring a large pot of salted water to a boil for the pasta. Heat the remaining olive oil in a medium skillet over medium-low heat. Add the garlic and saute for 1 to 2 minutes, stirring continuously, or until fragrant. Do not allow it to gain color (this can happen quickly!). Add the kalamata olives, capers, and red pepper flakes to the pan and saute for an additional minute or until warm. Taste for salt and pepper. Add half of the parsley to the skillet and keep the mixture warm – off the heat – as you cook the pasta.
    5. Boil the pasta until it is al dente, reserving a cup of cooking water. Return the pasta to the pot and add the kalamata olive and caper mixture and roasted Romanesco. Toss the mixutre together gently, adding the remaining chopped parsley, and a touch of extra virgin olive oil and reserved cooking water if dry. Season to taste with salt and pepper.
    6. Serve immediately and garnish with chopped parsley and parmigiana cheese as desired.

    More detailed nutrition information can be found on the original recipe’s website.

  • We’ve been enjoying our CSA Share from Farmer Dave for the last 3 months. This week, however, we were presented with one ginormous cabbage for which just two of us were somewhat at a loss for how to use it up. Yes, we did find a way to blanche and freeze part of it, but as condo dwellers, our freezer space is at a minimum. Here, however, is a great way to use half of a head of cabbage: soup!

    Vegetable Cabbage Soup by Lauren Miyashiro

    Ingredients

    • 2 TBSP extra virgin olive oil
    • 1 large onion, chopped
    • 2 carrots, chopped
    • 2 stalks celery, minced
    • 1/2 tsp chili powder
    • kosher salt
    • freshly ground black pepper
    • 1 15-oz can white beans, drained and rinsed
    • 2 cloves garlic, minced
    • 1 tsp thyme leaves
    • 4 cups low-sodium chicken broth or vegetable broth
    • 2 c water
    • 1/2 large head cabbage, chopped
    • 1 15-oz. can fire roasted chopped tomatoes
    • pinch red pepper flakes
    • 2 TBSP freshly chopped parsley (more for garnish)

    Method

    1. In large pot over medium heat, heat olive oil. Add onions, carrots and celery, and season with salt, pepper, and chili powder. Cook stirring often, until vegetables are soft (5-6 minutes. Stir in beans, garlic, and thyme and cook until garlic is fragrant, about 30 seconds. Add broth and water (I withheld the water until I knew I needed to add it) and bring to a simmer.
    2. Stir in tomatoes and cabbage and simmer until cabbage is wilted – about 6 minutes.
    3. Remove from heat and stir in red pepper flakes, and parsley. Season to taste with salt and pepper. Garnish with more parsley if using.
  • We’re coming to the close of our CSA Share for the regular season, and while it has been a positive experience, it is sometimes a challenge to find uses for some of the more unfamiliar items in our share. This week I was introduced to Aji Dulce peppers. Looking vaguely like Scotch Bonnet peppers, I wasn’t sure how we would make good use of a half-pint of them.

    However, as I’ve learned this summer, not everything is what it seems. Although there is a bit of heat to an Aji Dulce pepper, they are on the milder side (of hot stuff anyway). As always, Farmer Dave (click the link to explore the CSA options) offers some great ideas for using the produce in our share, this recipe coming from one of the Farm’s crew members, Bonifacio.

    I turned the whole lot of peppers into a Puerto Rican style Sofrito which will be used to flavor soups and stews all winter long (froze a portion into ice-cube sized portions).

    Bonifacio’s Sofrito (A Traditional Recipe from Puerto Rico)

    Ingredients

    • 1 Green Bell Peppers, seeded and chopped
    • 1 Red Bell Pepper, seeded and chopped
    • 10 or more Ají Dulce Peppers, chopped
    • 20 Cilantro Leaves
    • 2 Medium Tomatoes
    • 2 Medium Heads of Garlic, peeled
    • 2 Onions, chopped
    • Salt and Pepper

    Method

    1. Combine green peppers, red peppers, aji dulce peppers, tomatoes, onions and garlic in a food processor.
    2. Process to the consistency of salsa, not entirely liquified.
    3. Add cilantro, salt, and pepper (and process it a bit more)
    4. Stores well in freezer
  • Some time in the middle of all “THIS” as we refer to our Coronavirus isolation, Adrien began to take-over responsibility of Sunday meals. The rest of the week, I usually plan for and we jointly prepare whatever we are eating. I actually like to cook so it was never a chore once I stopped feeling the pressure from my teaching career. However, apparently I am “too bossy” to work with in the kitchen, so we’ve worked out this arrangement where I stay out of Sunday meal planning and prep.

    With a lot of corn in our recent CSA box – and a ton of tomatoes and cukes – Adrien found this salad from Holly Nilsson on the Spend with Pennies website. It is a welcome summer dish and very adaptable to whatever is growing that suits your fancy.

    Easy Corn Salad

    Ingredients – again, add or substitute what you have. If you like kohlrabi in place of cukes, go for it.

    3 TBSP vinegar (cider or rice)

    3 cups of corn kernals from about 4 cobs

    1 cup of quartered cherry tomatoes

    1 cup diced cucumbers

    1/4 cup red onion (we had a vidalia, still tasty)

    3 TBSP olive oil

    3 TBSP cider vinegar/rice vinegar/ or another lighter vinegar (probably not great with darker Balsamic vinegars)

    Salt, Pepper to taste

    1 TBSP fresh parsley

    Dill or basil (optional)

    Method

    Prepare the corn by boiling or grilling and remove the kernals from the cob. Put all of the ingredients into a bowl and toss.

  • In the process of using up an eggplant from our CSA Share yesterday (Google it – there are a million great sounding recipes for roasted eggplant dips), I discovered we had no actual bread in the house. Wheat thins didn’t seem like the appropriate vehicle for a Middle-eastern Dip, so I began looking at exactly what the skill level for Pita Bread might be. Whatever that skill level is, I can tell you that homemade Pita bread is worth the effort. Warm, soft, and with a great homemade bread aroma filling our home, I’m pretty sure we won’t be buying that pre-sealed and often dried out version from our local grocer.

    This recipe comes courtesy of the New York Times and was developed by David Tanis. It is delicious (did I already say that?), and I discovered that by sealing the dough balls in plastic and storing the in refrigerator, I could make fresh-from-the-oven Pita bread the very next day. One suggestion that I found made a huge difference: up the oven temperature to 500 degrees F and set a pizza stone in the oven. Heat that for about 20-30 minutes before baking.

    Homemade Pita Bread by David Tanis, NYT

    Ingredients

    • 2 tsp active dry yeast
    • 1/2 tsp sugar
    • 35 grams (1/4 cup) whole wheat flour
    • 310 grams (2-1/2 cups) all purpose flour
    • 1 tsp kosher salt
    • 2 TBSP olive oil

    Method

    1. Make sponge: Put 1 cup lukewarm water in a large mixing bowl. Add yeast and sugar. Stir to dissolve. Add the whole-wheat flour and 1/4 cup all purpose flour and whisk together. Put bowl in a warm (not hot) place, uncovered, until mixture is frothy and bubbling – about 15 minutes.
    2. Add salt, olive oil and nearly all remaining all-purpose flour (reserve 1/2 cup). With a wooden spoon, stir until mixture forms a shaggy mass. Dust with a little reserved flour, then knead in bowl for 1 minute, incorporating any stray bits of dry dough.
    3. Turn dough onto work surface. Knead lightly for 2 minutes until smooth. Cover and let rest for 10 minutes, then knead again for 2 minutes. Try not to add too much of the reserved flour; the dough should be soft and a bit moist (can be refrigerated at this point for several hours of overnight – bring dough back to room temp, knead into a ball and proceed with recipe).
    4. Clean the mixing bowl and put dough back in it. Cover bowl tightly with plastic wrap, then cover with a town. Put bowl in a warm (not hot) place. Leave dough until it has doubled in size – about 1 hour.
    5. Heat over to 475 degrees F (I upped mine – see note). On bottom shelf of oven, place a heavy duty baking sheet, large cast-iron pan or ceramic baking tile. Punch down dough and divide into 8 equal-sized pieces. Form each piece into a little ball. Place dough balls on work surface, cover with a damp towel and leave for 10 minutes.
    6. Remove 1 ball (keep others covered until using) and press into a flat disk with rolling pin. Roll to a 6-inch circle, then to an 8-inch diameter about 1/8 inch thick, dusting with flour as needed.
    7. Carefully lift the dough circle and place quickly on hot baking sheet. After 2 minutes the dough should be nicely puffed. Turn disk over with tongs or spatula and bake 1 minute more. The pita should be pale, with only a few brown speckles. Transfer warm pita to a napkin-lined basket and cover so bread stays soft. Repeat with the rest of the dough ball.

  • I did a double-take when I spotted this recipe for Yellow Squash (!) Bundt Cake. Yellow squash, seriously?

    But with an enormous haul of yellow squash in our CSA share the last 2 weeks, it felt as if this recipe from Southern Living was meant to be baked. So I did.

    Yellow Squash Bundt Cake (Southern Living)

    Ingredients for Cake

    • 2 cups All Purpose flour
    • 1 tsp baking powder
    • 1/2 tsp baking soda
    • 1/2 tsp salt
    • 3 large eggs at room temperature
    • 1-1/2 cups granulated sugar
    • 1 cup canola oil (I used coconut oil)
    • 2 cups grated yellow square
    • 1 TBS lemon zest plus 2 TBSP lemon juice

    Ingredients for Lemon Buttermilk Glaze

    • 2 cups unsifted powdered sugar
    • 2 TBSP buttermilk
    • 1 tsp lemon zest plus 1 TBSP fresh lemon juice

    Method

    1. Prepare the cake: preheat oven to 350 degrees F. Coat a 10-cup Bundt pan with baking spray (or just oil it). Stir together flour, baking powder, baking soda, and salt in a bowl. Place eggs, sugar and oil in the bowl of a stand mixer fitted with a paddle attachment. Beat on medium-high speed until light and airy (about 3 minutes), stopping to scrape down sides as needed. Stir in the squash, lemon zest and juice. Gradually add flour mixture, beating on low speed until just combined (about 45 seconds). Pour batter into prepared pan.
    2. Bake in preheated oven until a wood pick inserted in the center comes out clean (50-55 minutes). Cool in pan for 10 minutes. Invert onto wire rack and cool for 1 hour.
    3. Prepare the glaze. Whisk together all ingredients into a bowl until smooth. Drizzle over cooled cake.