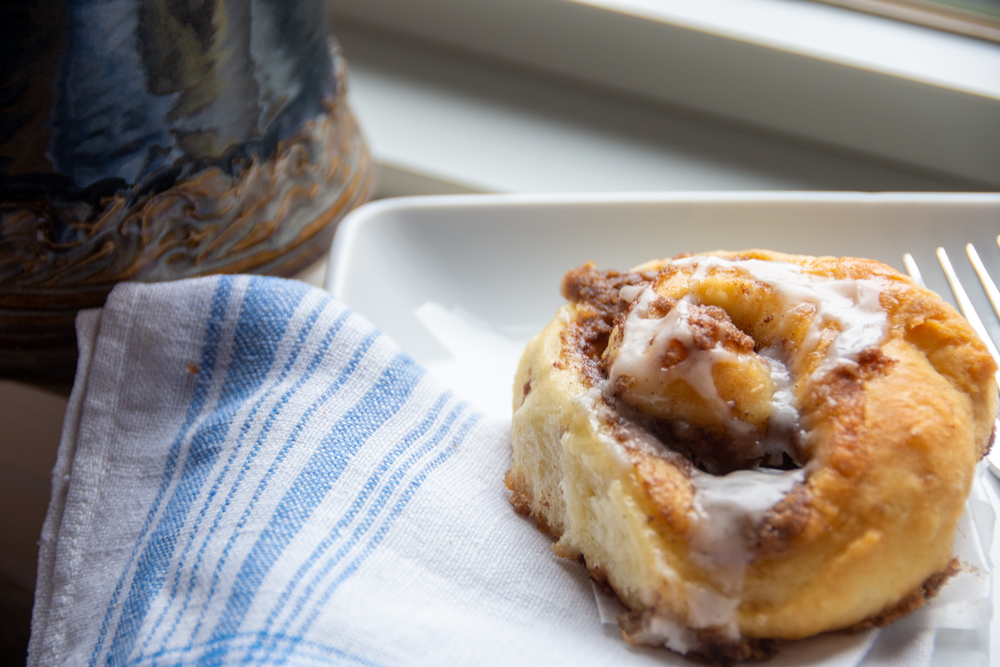
• Our granddaughter has an egg allergy which has prompted a lot of researching into egg-free baking and cooking. My experience with egg substitutions in “regular” recipes has not proven to be very successful. Oftentimes the bake is dry and heavy. So when I spotted this recipe, Light Cinnamon Rolls – Eggless from Munaty Cooking and saw the rave reviews it was, well exciting! My own memories of my Great-Grandmother Wyant’s baking (Apple Kuchen) were of light and buttery dough laced with cinnamon. Even though egg-free baking can be a technical challenge, I wanted to try to replicate some of those tastes from my memories.

    These absolutely live up to the hype of producing a “astonishing, light, soft, fluffy and heavenly cinnamon rolls.” Bonus points for the lowered calories – 187 – which make this Noomer happy to have an occasional treat. Treat yourself – exploring Muna Kenny’s blog and website for more creative and delightful recipe ideas. Also be sure to read the original post, linked in the title below, for some helpful information about ingredients, substitutions, and freezing instructions (as if there were any of these left!).

    Munaty Cooking’s Light Cinnamon Rolls – Eggless

    Ingredients

    FOR THE DOUGH

    • 3/4 cup warm milk mixed with 1 1/2 tablespoon lemon juice (set aside for 5 minutes)
    • 1/4 cup vegetable oil (I’ve used coconut oil and avocado oil with success)
    • 1 tablespoon melted unsalted butter
    • 2 teaspoon dry active yeast
    • 1/4 cup sugar
    • 2 1/4 cup all-purpose flour
    • 1/4 teaspoon baking powder
    • 1/4 teaspoon baking soda
    • 1/2 teaspoon salt

    FOR THE FILLING

    • 1/2 cup unpacked brown sugar
    • 1 tablespoon cinnamon powder
    • 3 tablespoon softened butter

    FOR THE GLAZE

    • 1/2 cup powdered sugar
    • 1/4 teaspoon vanilla extract
    • 1 tablespoon milk

    Method

    TO MAKE THE DOUGH

    • In a small bowl, mix the milk with sugar and yeast. Cover and set aside for 10 minutes.
    • Sift flour, baking soda, baking powder, and salt. Keep aside.
    • Add the butter and oil to the flour and mix using a paddle attachment if using a stand mixer, or beat it using a stand mixer, or use your hand instead. (I did mix by hand as my mixer was in need of repair)
    • Add the milk mixture to the flour gradually and knead until you get a smooth dough, will take 7 – 10 minutes of kneading with hands.
    • Cover the dough and keep in warm place to rise, for 1 or 1 and half hour.

    MAKING THE FILLING

    • Mix all ingredients together and keep aside in cool place.

    MAKING THE GLAZE

    • Mix all ingredients together and keep aside in cool place.

    MAKING THE CINNAMON ROLLS

    • Roll dough into a rectangle 24″ by 18″ or 18″x18″ to make bigger rolls. (I did 18×18)
    • Spread the filling by sprinkling it over the rolled-out dough, it’s faster. Or use a spatula and spread it evenly. With heat, and while baking, the filling will spread within the rolls!
    • Roll it up from the longest side, roll tight but not too tight. Pinch the seam tightly.
    • Cut the roll into 16 slices and place on a baking sheet. For bigger rolls cut 9. Use a 9×9 inch baking pan. Place parchment paper at the pan’s bottom. Place the rolls in the baking pan, keeping a small gap between each roll.
    • Cover the rolls and let them rise for 40 minutes.
    • Preheat oven to 180C/360F. Bake 15 to 18 minutes or until it’s golden.

  • We keep frozen seafood on hand these days. Frozen seafoods in my opinion, are not always a great substitute for fresh, but when our food shopping choices went down to whatever we could find curbside (meaning I was no longer standing in front of the fish counter asking when something had been brought in), I gave myself permission to rely on frozen. I do not indulge in seafood swimming in butter sauces – or worse – but it has been a convenience to find filets and flash-frozen seafood for cooking.

    This recipe is a great way to include healthier seafood dishes in our meal rotations and it made enough for a lunch later in the week. While we wait for warmer weather, why not bring a little of the Caribbean to our table?

    Ellie Kreiger, who has made a life’s work out of developing healthy and tasty nutritious meals contributed this recipe to the Washington Post (see original link here).

    Ellie Kreiger’s Caribbean-Style Seafood Stew

    Ingredients

    • 2 tablespoons neutral oil (I chose avocado oil)
    • 1 medium yellow onion (about 8 ounces), diced
    • 1 medium yellow or orange bell pepper (about 8 ounces), diced
    • 1 celery stalk, sliced
    • 1/2 Scotch bonnet or habanero pepper, seeded and thinly sliced (judge accordingly, but don’t skip this)
    • 2 cloves garlic, minced or finely grated
    • 1 1/2 teaspoons chopped thyme
    • 1/2 teaspoon kosher salt, plus more to taste
    • 1/4 teaspoon freshly ground black pepper
    • 1 cup canned no-salt-added diced tomatoes with juices, or 1 cup fresh diced tomatoes with juices
    • 1 cup seafood stock or water
    • 1 tablespoon fresh lime juice, plus more to taste
    • 1 1/2 pounds skin-on or skinless red snapper, or skinless mahi mahi or other white fish fillet, cut into 1 1/2-inch pieces
    • 8 ounces large shrimp (about 12 shrimp), peeled and deveined
    • 1/4 cup fresh cilantro leaves
    • Cooked rice, for serving (optional)

    Method

    1. In a large Dutch oven or a large, deep skillet over medium heat, heat the oil until shimmering. Add the onion, bell pepper, celery, Scotch bonnet or habanero and cook, stirring occasionally, until the vegetables have softened somewhat but have not browned, 4 to 5 minutes.
    2. Stir in the garlic, thyme, salt and pepper and cook for 30 seconds more.
    3. Add the tomatoes, seafood stock or water and the lime juice, and bring to a boil. Reduce the heat to medium-low, cover, and simmer until the sauce thickens a bit and the flavors are melded, about 10 minutes.
    4. Gently stir in the fish and shrimp, raise the heat to medium, cover and cook, stirring gently occasionally, until the seafood is just cooked through, 5 to 7 minutes.
    5. Taste, and season with additional salt and lime juice, if desired. Divide the stew among bowls, garnish with cilantro, and serve with rice, if desired.

    For Noomers: Calories 354; Fat: 10g; Sodium: 597mg; Carbohydrates: 19g; Sugar: 8g; Protein: 45g

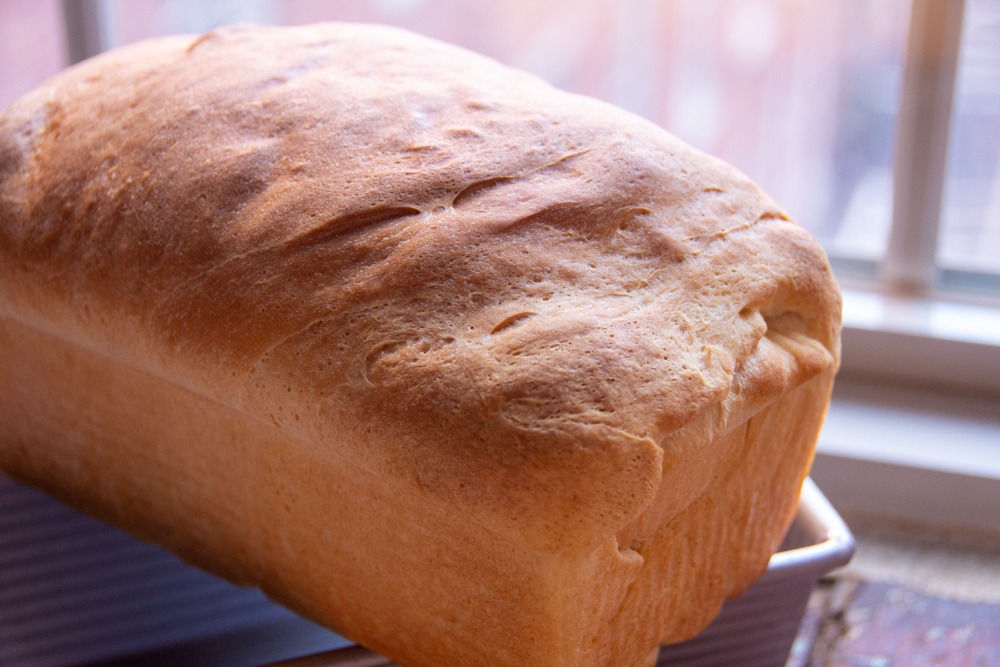
  • I’ve been on the hunt for a less rustic loaf of bread recently and, of course, I’m finding lots of options on King Arthur Baking’s recipe site. This one looks like a winner for sandwich breads and is going into the bread-baking rotation.

    We rarely have an abundance of milk in our fridge any more; most of what I buy is already designated for breakfast cereal so bread recipes calling for milk – lukewarm or otherwise – tend to be a supply chain challenge. However, as luck would have it, I keep a container of Baker’s Special Dry Milk on hand. Note that this dry milk product does not reconstitute like powdered milk some of us are familiar with from long ago. Baker’s Special Dry Milk is added to other dry ingredients (1/4 cup for every 3 cups of flour – or in this recipe’s case, 1 cup of milk that is called for). The liquid (1 cup) is replaced by lukewarm water. I added the butter, sugar and yeast to the water and all worked out well.

    Hopefully this Fall, we’ll be able to make the trek to King Arthur’s Norwich, Vermont headquarters to make a comparison taste test.

    King Arthur Baking “Our Favorite Sandwich Bread”

    Ingredients

    • 1 cup (227g) milk (see introduction for adapting to using Baker’s Milk)
    • 2 tablespoons (28g) butter
    • 2 teaspoons instant yeast or active dry yeast
    • 2 tablespoons (25g) sugar
    • 1 1/4 teaspoons (8g) salt
    • 3 cups (361g) King Arthur Unbleached All-Purpose Flour

    Method

    1. Heat the milk to a simmer, and pour it over the butter in a large mixing bowl. Let the mixture cool to lukewarm, then add the yeast and sugar. (see introduction for how I adapted using Baker’s Special Milk as a replacement for milk)
    2. Once the yeast softens, add the remaining ingredients and stir until the dough starts to leave the sides of the bowl.
    3. Transfer the dough to a lightly greased surface, oil your hands, and knead it for 6 to 8 minutes, or until it begins to become smooth and supple. (You may also knead this dough in an electric mixer or food processor, or in a bread machine set to the dough or manual cycle). Add a bit of additional milk or flour if needed — the dough should be soft, but not sticky.
    4. Transfer the dough to a lightly greased bowl, cover, and allow it to rise until puffy though not necessarily doubled in bulk, about 1 hour.
    5. Transfer the dough to a lightly oiled work surface, and shape it into an 8″ log. Place the log in a lightly greased 8 1/2″ x 4 1/2″ loaf pan, cover loosely with lightly greased plastic wrap, and allow the bread to rise for about 60 minutes, until it’s domed about 1″ above the edge of the pan. A finger pressed into the dough should leave a mark that rebounds slowly.
    6. Towards the end of the rising time, preheat the oven to 350°F.
    7. Bake the bread for 30 to 35 minutes, until it’s light golden brown. Test it by removing it from the pan and thumping it on the bottom (it should sound hollow), or by measuring its interior temperature with a digital thermometer (it should register 190°F at the center of the loaf).
    8. Remove the bread from the oven, and cool it on rack before slicing.
    9. Store the bread in a plastic bag at room temperature for several days; freeze for longer storage.
  • Food shopping, even now after a full year of the pandemic, continues to be a challenge for us. We’ve found that agile substitutions whenever planning a week’s cooking and eating is a skill that continues as spot shortages in food supplies continue. This skillet dinner was a good one for us. It employs shelf stable gnocchi, canned beans and canned tomatoes, and I could readily substitute the remaining kale I had in the fridge for the chard the recipe originally called for.

    I’ve recently discovered Eating Well magazine and have found the recipes on their website and in their periodical are delicious as well as healthy. This recipe, originally published in the January/February 2009 issue, is all that, AND vegetarian. As the cheese is optional, it easily translates to a plant-based winner.

    Skillet Gnocchi with Chard & White Beans

    Ingredients

    • 1 tablespoon plus 1 teaspoon extra-virgin olive oil, divided 
    • 1 16-ounce package shelf-stable gnocchi  
    • 1 medium yellow onion, thinly sliced 
    • 4 cloves garlic, minced 
    • ½ cup water 
    • 6 cups chopped chard leaves, (about 1 small bunch) or spinach (I substituted kale)
    • 1 15-ounce can diced tomatoes with Italian seasonings 
    • 1 15-ounce can white beans, rinsed 
    • ¼ teaspoon freshly ground pepper 
    • ½ cup shredded part-skim mozzarella cheese (left out to make more of a vegan meal)
    • ¼ cup finely shredded Parmesan cheese (left out to make more of a vegan meal)

    Method

    1. Heat 1 tablespoon oil in a large nonstick skillet over medium heat. Add gnocchi and cook, stirring often, until plumped and starting to brown, 5 to 7 minutes. Transfer to a bowl.
    2. Add the remaining 1 teaspoon oil and onion to the pan and cook, stirring, over medium heat, for 2 minutes. Stir in garlic and water. Cover and cook until the onion is soft, 4 to 6 minutes.
    3. Add chard (or spinach) (or kale) and cook, stirring, until starting to wilt, 1 to 2 minutes.
    4. Stir in tomatoes, beans and pepper and bring to a simmer.
    5. Stir in the gnocchi and sprinkle with mozzarella and Parmesan (I left this out). Cover and cook until the cheese is melted and the sauce is bubbling, about 3 minutes.

    For fellow Noomers:

    Serving Size: 1 Cup (which is approximately 1/6 of recipe) Per Serving: 326 calories; protein 13.7g; carbohydrates 56.1g; sugars 4.9g; fat 6.6g; sodium 610.3mg. 

  • Sheet Pan Crisp Tofu and Sweet Potatoes from NYT’s Melissa Clark

    Sheet Pan dinners seem to be everywhere lately! This one from cookbook author (this one-Dinner in French-is my favorite) and food writer Melissa Clark uses two of my go-to ingredients: tofu and sweet potatoes. We eat tofu frequently, but usually just in stir-fry recipes; this one promised something more interesting, and it sure did deliver! Because there are just two of us at home, I opted for making the whole amount (4 servings) of the tofu and half (2 servings) of the sweet potatoes. That turned out to be a good idea: the leftover tofu was easily reheated and added to salads for the next day’s lunch. Delicious!

    Sheet Pan Crisp Tofu and Sweet Potatoes (Melissa Clark, New York Times)

    Ingredients:

    • 1 (14-ounce) package extra-firm tofu, cut crosswise into 4 1-inch thick slices
    • 2 tablespoons peanut oil, plus more as needed (I used coconut oil which was had on-hand)
    • 2 tablespoons tamari
    • 1 ½ teaspoons honey
    • 1 tablespoon plus 1 teaspoon rice wine vinegar
    • 1 tablespoon cornstarch
    • 4 medium sweet potatoes (about 8 ounces each), cut lengthwise into 3/4-inch wedges
    • ½ teaspoon kosher salt, plus more to taste
    • ¼ teaspoon black pepper
    • 4 scallions, cut into 3-inch pieces and thinly sliced lengthwise
    •  Large pinch of sugar
    • ½ cup cilantro leaves
    •  Hot sesame chile oil, or red-pepper flakes, for serving
    •  Salted, roasted peanuts, for serving (optional)

    Method:

    1. Heat oven to 400 degrees.
    2. Do not skip this step! Arrange tofu pieces, cut sides down, on a clean kitchen towel or paper towels. Cover with another kitchen towel, and place a flat cutting board on top. If your cutting board is lightweight, stack a few cans or a skillet on top to weigh it down. Let tofu drain for at least 10 minutes (and up to 30 minutes), then transfer to a cutting board. Cut strips into 3/4-inch pieces (1-inch thick), and transfer to a medium bowl.
    3. In a small bowl, whisk together oil, tamari, honey and 1 teaspoon vinegar. Toss half the mixture with the tofu, then toss in cornstarch. Arrange in a single layer on a rimmed sheet pan.
    4. On a separate rimmed sheet pan, toss together potato wedges, 1/2 teaspoon salt and pepper. Arrange in a single layer; do not crowd the pan. If they don’t all fit, arrange extra wedges on the pan with the tofu.
    5. Bake tofu and potatoes until browned, 35 to 40 minutes, flipping them halfway through. If the tofu sticks (and this is likely), use a thin metal spatula to carefully loosen each one before flipping. A small offset spatula is perfect here.
    6. Meanwhile, in a medium bowl, combine scallions, 1 tablespoon vinegar and a large pinch each sugar and salt. Let sit while tofu and potatoes roast.
    7. To serve, toss tofu with some of the reserved tamari sauce, to taste. Serve with potato wedges, topped with scallions, cilantro and a drizzle of hot sesame chile oil or sprinkling of red-pepper flakes, and more tamari sauce. Sprinkle with peanuts if desired.

    For Noomers: Calories=298, Fat=11g; Carbs=40g; Sugar=10g; Protein=12g, Sodium=843

  • Seattle Smoked Salmon Chowder from Skinny Taste

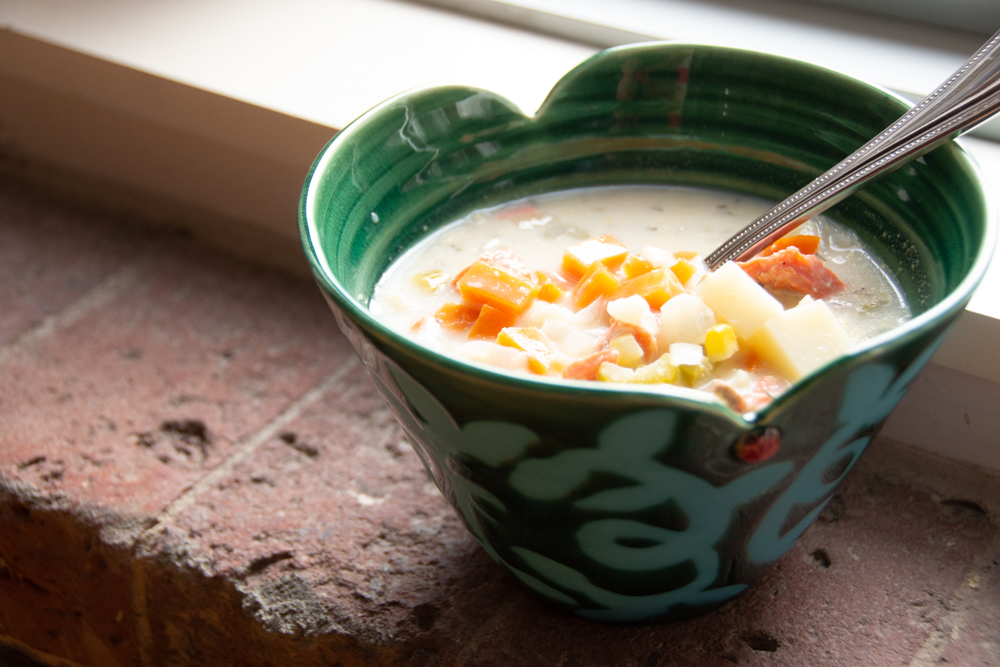
    Winter has been continuing to hold an ice-cold grip on temperatures, so this week I felt the need to make a bowl of comfort food. This smoked salmon chowder from Skinny Taste was exactly what I was looking for! The balance between lower fat milk (I used the 1% we normally have on hand and not whole milk) and the rich flavor of smoked salmon was the warming antidote to the blast of arctic air. Skinny Taste’s original recipe gives directions for both stove-top and Instant Pot; I chose the stove-top which didn’t seem to be that much of a time problem. Visit the recipe’s original post for the Instant Pot directions.

    The soup was served up in one of my favorite pieces – a handmade ceramic bowl made by one of Adrien’s former artist neighbors at Western Avenue Studios in Lowell – Liz Rodriguez. Liz’s ceramic pieces are beautiful and unique and some of my most treasured pieces for serving. You can learn more about Liz at her website Liz Rodriguez Ceramics.

    Skinny Taste’s Seattle Smoked Salmon Chowder

    Ingredients

    •  2 tablespoons unsalted butter (I substituted coconut oil)
    • 1 medium yellow onion, diced
    • 3 medium carrots, ½-inch dice
    • 3 large celery stalks, ½-inch dice
    • 2 garlic cloves, minced
    • 2 teaspoons kosher salt
    • 2 tablespoons all-purpose flour
    • ½ cup white wine, such as Sauvignon Blanc
    • 1 teaspoon dry thyme
    • 3 cups reduced sodium chicken broth (No chicken broth? Not to worry – I used water, but veg broth also nice)
    • 1 12-ounce wedge cauliflower (1/4 of a large head), stem attached
    • 3 small red potatoes, peeled and diced into ½ inch pieces
    • 1 cup frozen corn kernels
    • 2 cups whole milk (substituted the low-fat milk we had on hand)
    • Freshly ground black pepper
    • 8 ounces skinless hot-smoked salmon
    • Chopped chives, for garnish

    Method – Stove Top (See Skinny Taste website for Instant Pot directions)

    1. In a large (Dutch oven or ) heavy pot, melt butter over medium heat.
    2. Add the onion, carrots, celery, garlic and ½ teaspoon salt and sauté until vegetables start to soften, about 5 minutes.
    3. Sprinkle flour evenly over vegetables and cook, stirring often, for 1 minute.
    4. Add wine and deglaze the pot.
    5. Add the thyme, broth, cauliflower and potatoes, bring the pot to a boil, then reduce heat to simmer, cover and cook for 20 minutes.
    6. Remove the lid from pot and transfer the cauliflower (I used frozen because THAT’s what we could access) and 1 cup of the soup to a blender and blend until smooth. Transfer puree back to the pot. (I skipped the blending because I prefer the chunkiness)
    7. Add the milk, corn, and smoked salmon and heat through for about 5 minutes.
    8. Season with remaining salt and freshly ground pepper, to taste.
    9. Ladle 2 cups of soup into each bowl and top with chives

    For Noomers:

    Calories = 377, Carbs = 38, Protein = 31, Fat = 11.5, Sugar = 9, Sodium = 783

  • The Washington Post has started a new email newsletter authored by WaPo’s food writer, Daniela Galarza called Eat Voraciously and the very first email was – as Guy Fieri might say – “off the hook”. Use this link to read more about Daniela’s mission and subscribe to receive the newsletter – or even better, subscribe to the Post.

    This Picadillo recipe has many different and tasty variations. It can be vegetarian, vegan, meaty…. whatever hits you at the moment. I also appreciated that the many cubes of Sofrito, a result of this summer’s foray into CSA shares and aji dulce peppers, could be utilized to make the food prep even faster. As both of us like our food hot and spicy, we took the liberty of serving Craic Sauce’s Mill City Red on the side. To read more about this locally produced line of hot sauces, visit Craft Hot Sauce to read and hear more about creator, Brian Ruhlmann or look for Craic’s Sauce and where it’s available on social media.

    Eat Voraciously’s Picadillo Recipe

    Ingredients (Read Daniela’s original post for more ideas)

    • 2 tablespoons olive oil
    • 1 small yellow onion (4 to 5 ounces), finely chopped
    • 1/2 bell pepper, any color, finely chopped (optional)
    • 5 stems fresh cilantro and their leaves, chopped
    • 2 garlic cloves, minced
    • 1 pound lean ground beef (I used ground turkey)
    • 1/2 teaspoon fine sea salt or table salt, plus more as needed
    • 1 teaspoon ground cumin
    • 1/2 teaspoon paprika (any kind) (I used a hot paprika)
    • 1/2 teaspoon dried oregano
    • 1/4 teaspoon ground black pepper
    • 1 (15-ounce) can crushed or diced tomatoes, preferably with no salt added
    • 2 tablespoons tomato paste
    • 1/4 cup dark or golden raisins (optional) (I would say, don’t skip unless you dislike raisins)
    • 1/4 cup pimento-stuffed green olives, halved (optional) (I would say, don’t skip unless you dislike olives)
    • Steamed rice for serving (optional)

    Method

    1. In a wide skillet over high heat, heat the oil until it shimmers. Add the onion and bell pepper, if using, and cook, stirring often, just until they begin to brown, about 3 minutes. Lower the heat to medium and add most of the cilantro — reserving a few leaves for garnish — garlic and ground beef. Using a wooden spoon or spatula, break the ground beef into bits so that it cooks evenly. Stir in the salt, cumin, paprika, oregano and black pepper.
    2. Cook the beef until its fat has rendered and it’s brown with a few pink spots, 5 to 8 minutes. (Drain excess fat, if desired.) Stir in the tomatoes and tomato paste. Bring to a simmer and cook over medium heat for another 5 minutes, using a spoon or spatula to break up any large chunks of tomato. (If the mixture starts to look dry, add a splash or two of water to loosen it.)
    3. Stir in the raisins and olives, if using, and simmer until they’ve softened, 3 or 4 minutes. Taste and adjust seasonings, keeping in mind that the raisins add a little sweetness and the olives add salinity and a touch of acidity. Garnish with the reserved cilantro leaves and serve the picadillo hot, with cooked rice.

    For my Noomer friends: (Based on 6 servings, excluding rice): Calories: 249; Protein: 15g; Carbohydrates: 8g; Fat: 20g; Saturated Fat: 6g; Cholesterol: 54mg; Sodium: 259mg; Fiber: 3g; Sugar: 4g.

  • Like most everyone, our Valentine’s Day celebration was quite a bit different this year. And so, embracing the change, we moved away from the usual big meal and headed toward something entirely out of our usual taste profiles. Depending on the culture, a koftas is a meatball or meatloaf dish, mainly found in Middle Eastern or the Indian subcontinent. Read more about that here.

    The dish we prepared for each other for Valentine’s Day 2021 comes from a New York Times recipe shared by Nik Sharma, a Los Angeles based blogger, food writer and cookbook author. You can find out more on Nik’s website, A Brown Table. We substituted ground turkey for the chicken, but I would imagine either will be delicious.

    So, here’s our Ode to a Different Valentine’s Day: Chicken Koftas with Lime Couscous. It was delicious – and even better the second day.

    Chicken Koftas with Lime Couscous by Nik Sharma

    Ingredients for Couscous

    • 1 ½ cups low-sodium chicken stock
    • 2 tablespoons lime juice, plus 1/2 teaspoon lime zest
    • 1 tablespoon extra-virgin olive oil
    • 1 teaspoon red-pepper flakes
    •  Fine sea salt and freshly ground black pepper
    • 1 cup couscous
    • ¼ loosely packed cup chopped flat-leaf parsley leaves
    • ¼ cup dried sweet-tart cherries or cranberries (We used dried cranberries – already in the pantry)
    • 3 tablespoons toasted pine nuts

    Ingredients for Koftas

    • 1 pound ground chicken or turkey (we used turkey this time)
    • 2 shallots, peeled and minced
    • 1 large egg, lightly whisked
    • 2 tablespoons chopped flat-leaf parsley leaves
    • 1 serrano chile, trimmed and chopped
    • 4 garlic cloves, peeled and minced
    • 2 tablespoons peeled and grated fresh ginger
    •  Fine sea salt and freshly ground black pepper
    •  Olive oil
    • 1 lime, cut into wedges, for serving

    Method:

    1. Make the couscous: In a medium saucepan over high heat, bring the stock, lime juice, olive oil, red-pepper flakes and 1 teaspoon salt to a rolling boil. Remove from the heat and stir in the couscous. Cover with a lid and let sit for 10 minutes.
    2. As the couscous sits, prepare the koftas: Place the ground chicken, shallots, egg, parsley, serrano, garlic, ginger, 1 teaspoon salt and 1 teaspoon pepper in the bowl of a food processor and pulse until the mixture resembles a coarse paste. (One suggestion from a cook on the NYT website was to forego processing. We thought that the extra pulsing made the Koftas well-blended and was worth the extra time/step)
    3. Frying the koftas: Heat 2 to 3 tablespoons of olive oil in a large (12-inch) cast-iron skillet or nonstick pan over medium-low. Grease your hands with a little oil and divide and shape the ground chicken mixture into 12 balls. Fry them in the hot oil, in batches if necessary, until golden brown on all sides and the internal temperature reads 165 degrees on an instant-read thermometer, about 8 to 10 minutes. Using a slotted spoon, transfer the koftas to a tray or plate lined with paper towels. (Another commenter on NYT suggests baking the Koftas – 15 mins. at 350 F. Whatever the method, make sure that the meat is cooked to 165 F)
    4. Finishing and plating: Uncover the couscous, fluff the mixture with a fork and break up any lumps. Transfer the couscous to a large mixing bowl. Fold in the lime zest, parsley, cherries and pine nuts, then season to taste with salt and pepper. Fold in the koftas and serve immediately with the lime wedges.
  • Vegan Garlic Pasta with Broccoli Rabe

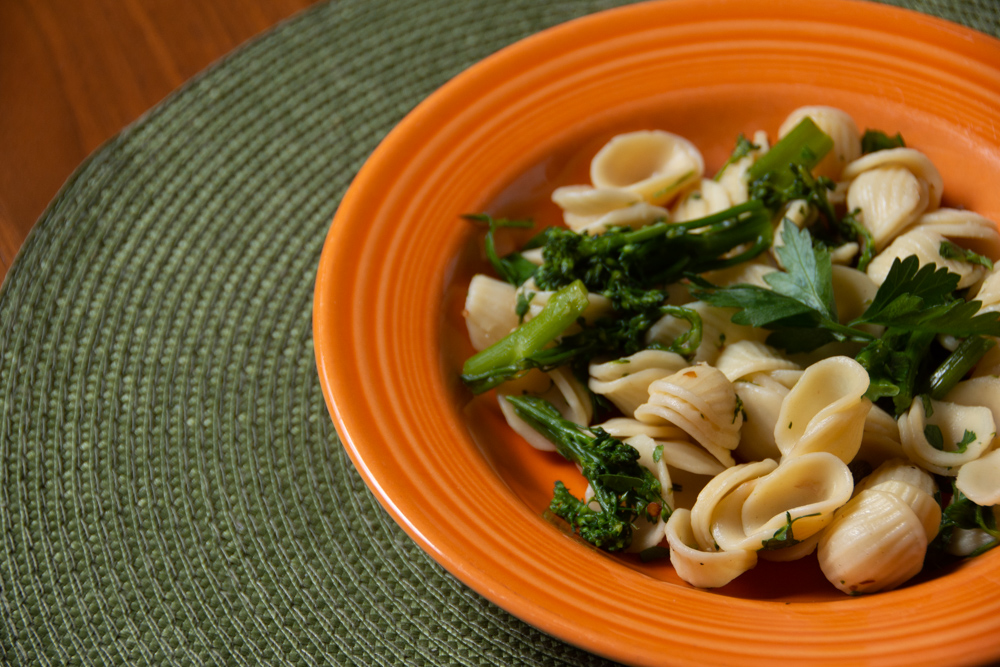
    Recently, I’ve discovered a treasure trove of vegan recipes created by Vaishali on Holy Cow Vegan’s website. In trying to eat more plant based foods, this website has some wonderfully creative recipe takes on old and new favorites. This week’s shared recipe came together quickly – a good thing for weeknights – and with the addition of a few capers just before serving, was an healthy, elegant meal. With a nod toward food shopping in a pandemic, I substituted Oricchiette pasta which was opened in my pantry for the spaghetti in Vaishali’s original recipe.

    Vegan Garlic Pasta with Broccoli Rabe

    Ingredients

    • 1 16-oz package of spaghetti or any other pasta (I used oricchiette)
    • 1 large bunch of broccoli rabe
    • 6 large cloves garlic, smashed and sliced thinly
    • 1 TBSP extra virgin olive oil
    • 1 tsp red pepper flakes (or a bit more if you like things on the hotter side)
    • Salt and pepper to taste
    • 1/4 cup parsley chopped (optional)
    • ALSO OPTION SUGGESTIONS FROM VAISHALI: dash of lemon juice and/or a handful of capers

    Method

    1. Bring a large pot of salted water to boil. Add broccoli rabe and cook for two minutes. Remove (don’t drain! use a slotted spoon) the broccoli rabe to a chopping board, chop (I made 1 1/2 inch cuts) and set aside. Cook the pasta in the same water according to package directions.
    2. Heat the oil in a large saucepan. Add the garlic and saute until it starts to turn light gold.
    3. Add the red pepper flakes, the broccoli rabe, and salt & pepper (to taste). Stir-fry for 4 to 5 minutes.
    4. Add the pasta with a cup of the pasta cooking water. Add the (optional, but I’d suggest not skipping) parsley, stir well to mix, check seasoning and turn off heat. (Here’s where to add lemon or capers if using).
    5. Serve warm or at a room temperature.

    For Noomers:

    Calories 277, Carbs 49.3 g, Protein 14.3 g, Fat 3.6 g, sugar 2.4 g

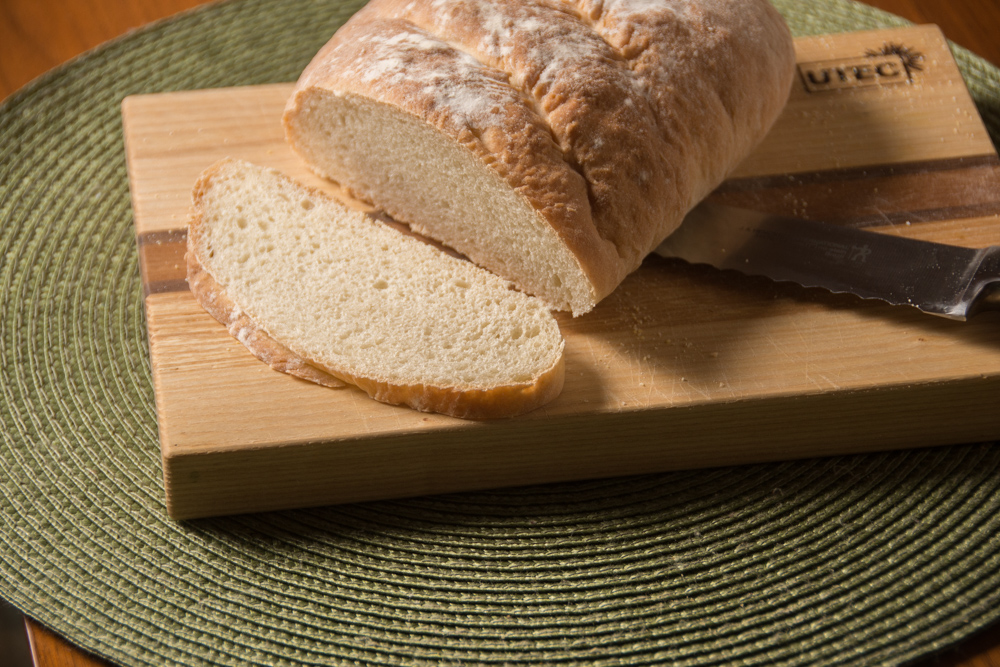
  • According to King Arthur Baking Company, this is the Easiest Loaf of Bread You’ll Ever Bake. I don’t know if every bread baker will agree with that sentiment, but it certainly is not complicated and turns out a delicious pair of loaves that stayed fresh for the couple of days that we consumed it (one frozen for later).

    Two things I have learned about bread baking: one is to use a scale for measuring and this cannot be over-stated. I like consistency from bake to bake especially after investing time in a bread recipe. Getting a food scale has been a game-changer for me. Second, do not short-cut kneading. In addition to getting the elasticity of the dough right, it’s a great (COVID) stress reliever.

    So with that in mind, here’s the Easiest Loaf of Bread You’ll Ever Bake, courtesy of the folks at King Arthur Baking.

    Easiest Loaf of Bread You’ll Ever Bake

    Ingredients

    • 4 1/2-5 cups (542g to 600g) Unbleached Flour (I use King Arthur All Purpose)
    • 1 TBSP (11g) sugar
    • 2 1/4 tsp instant yeast
    • 2 1/2 tsp (15g) table salt – not Kosher
    • 1 2/3 cups (379g) water, lukewarm (90-110 degrees F)
    • Cornmeal for coating the pan

    Method

    1. Weigh your flour (my recommendation); or measure it by gently spooning it into a cup, then sweeping off any excess.
    2. Stir together all of the ingredients (except the cornmeal) in a large bowl, starting with 4 1/2 cups of the flour (or 542g if weighing). Use a sturdy spoon, or your stand mixer equipped with the beater paddle (I used the mixer throughout). Mix until everything comes together in a rough, shaggy mass of dough.
    3. If you’re kneading the dough by hand, turn it out onto a lightly floured surface, using some of the additional 1/2 cup of flour called for. Fold the far edge of the dough back over on itself towards you, then press it away from you with the heels of your hands. Rotate the dough 90°. Repeat this fold-press-rotate process with a rhythmic, rocking motion for about 6 minutes. When fully kneaded, the dough will be bouncy and smooth.
    4. If you’re using your stand mixer, switch to the dough hook and knead the dough at medium speed for about 7 minutes, until it’s smooth, elastic, and feels a bit bouncy. If the dough doesn’t form a ball that clears the sides of the bowl, sprinkle in just enough of the additional flour to make this happen.
    5. Place the dough in a bowl that’s been lightly greased with vegetable oil or cooking spray; the bowl you started with is fine (not a fan of dried bits of bread dough, so I used a new bowl). Cover the bowl with plastic wrap or another airtight cover, and let the dough rise at room temperature until it’s doubled in size, about 1 to 2 hours. If your kitchen is particularly cold (below 65°F), place the bowl of dough in your turned-off oven with the oven light on (or, if your stove has a PROOFING setting, use it).
    6. Gently deflate the dough and cut it in half. Pat each half into a rough 6” x 8” oval.
    7. Working with one piece of dough at a time, grab a short side and fold the dough like a business letter (one short side into the center, the other short side over it). Use the heel of your hand to press the open edge of the “letter” closed. Gently pat and roll the dough into a log about 10” long. Repeat with the remaining piece of dough.
    8. Place the loaves, seam-side down, on a baking sheet (lined with parchment if desired). Sprinkle the pan (or parchment) generously with cornmeal; this will keep the bread from sticking and give it a crunchy bottom crust.
    9. Let the loaves rise, lightly covered with greased plastic wrap, for 45 minutes. They should become nicely puffy. Gently poke your index finger into the side of one of the loaves; if the indentation remains, your bread is ready to bake.
    10. Towards the end of the rising time, preheat the oven to 450°F.
    11. For extra-crusty crust and a great rise, add steam to your oven as follows: While the oven is preheating, place an empty cast-iron frying pan on the lowest rack. Bring 1 cup of water to a boil in the microwave or on the stovetop.
    12. When your bread is risen, use a sieve to dust the loaves with a thin coat of flour. Then make three or four 1/2” deep diagonal slashes in each loaf; these slashes will help the bread rise evenly as it bakes. Place the bread in the oven and pour the boiling water into the frying pan below. Quickly shut the oven door. Wear good oven mitts during this process to shield your hands and arms from the steam.
    13. Bake the bread for 20 to 25 minutes, until the crust is golden brown and a loaf sounds hollow to the touch when you tap it on the bottom. The interior temperature of the bread should register at least 190°F on a digital thermometer.
    14. (DO NOT SKIP THIS STEP) Turn the oven off, crack the door open, and allow the bread to remain inside for 5 additional minutes; this helps keep the crust crisp. Remove the bread from the oven and cool it on a rack. It’s best not to cut into the bread until it’s cooled down a bit; cutting into hot bread can negatively affect its texture.
    15. Store the bread, well-wrapped, at room temperature for a couple of days. Freeze for longer storage.