We’ve been making more of an effort to use up everything we purchase when food shopping. That does get to be a challenge between the buying ahead that happens during the Winter months (in case weather prevents us from getting out) and shortages caused by COVID. This week I had quite a bit of Lacinto Kale left from a cooking class that I took – classic Amy-overbuying – so I wanted to find some way to use it that didn’t necessarily involve soup or salad.
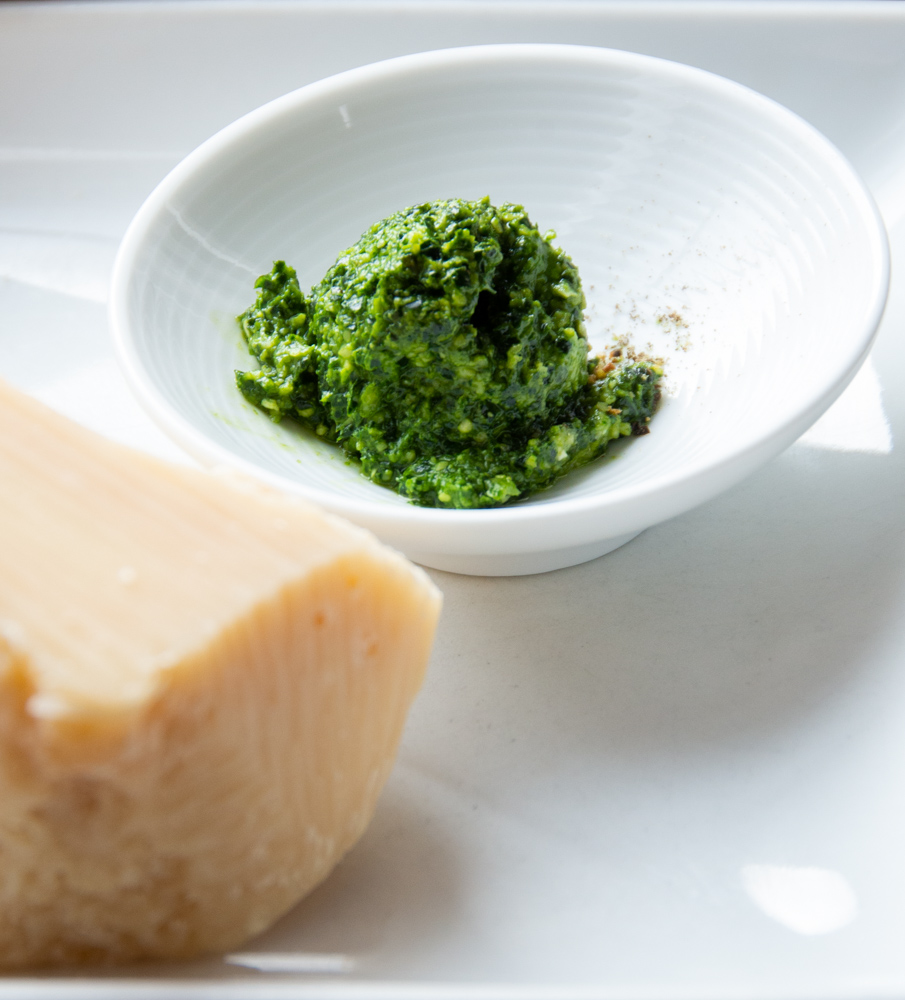
Love and Lemons food blog is a great resource for cooks, especially ones interested in vegan/vegetarian cooking, although you don’t have to be either to enjoy these food ideas. Needless to say, I found a quick, easy way to use up our excess kale and we have some delicious pesto on hand for adding to soups and pizzas as well as pasta.
1/2 c pepitas (I had pignoli nuts in the pantry so used those up)
1 small clove garlic
1/4 c grated parmesan cheese or 1 TBSP nutritional yeast (I used the cheese)
1/4 tsp sea salt
Freshly ground black pepper
2 packed cups curly kale (I used up my Lacinto kale)
2 TBSP lemon juice
1/2 c extra virgin olive oil
Method
Using a food processor, pulse the pepitas (or whatever nuts you decided on) and garlic until they are ground up.
Add the cheese or nutritional yeast, salt and several grinds of black pepper and pulse again.
Add the kale and lemon juice.
With the food processor running, drizzle in the olive oil and process until combined. Season to taste (also noted in the original: if the kale pesto tastes too bitter add 1/4 tsp maple syrup or honey – I didn’t need to do this).
Keeps in the fridge for up to 3 days; can also be frozen for up to 2 months.
One of the improvements I’ve been trying to implement in 2022 is an increase in plant-based cooking. That’s lead to the discovery of Nisha Vora’s recipes on Rainbow Plant Life. This one was a definite winner because not only is it tasty and plant-based, as promised it was a 20-minute vegan meal. Twenty-minutes? Yes!
¼ tsp garlic powder or 2 garlic cloves, roughly chopped
1 small jalapeño pepper or ½ of a jalapeño pepper, cut in half
2 to 3 TSBP freshly squeezed lime juice
1/4 tsp kosher salt plus more to taste
Freshly cracked black pepper to taste
4 to 5 TBSP of Extra Virgin Olive Oil
1-3 TBSP water (only as needed-I needed about an extra TBSP)
Taco ingredients
6 corn tortillas (I used Nisha’s recommendation of La Tortilla Factory Tortillas, handmade style)
1 large avocado diced
Salsa of choice
Method:
Transfer the chickpeas to a clean dish towel or a layer of paper towels and gently pat dry as much as you can without smushing them.
Heat a large nonstick frying pan over medium-high heat with the 2 teaspoons of oil and spread the oil out with a paper towel to evenly distribute it. Once hot, add the chickpeas and spread out in a single layer. Cook undisturbed for 2 to 3 minutes to allow some browning. Toss and cook for another 3 minutes, or until chickpeas are golden brown and blistered in spots. (It was lots of fun to hear the chickpeas pop as they heated – may be best to stay close as they “may” pop out of the pan)
Add salt and spices, and toss well to coat the chickpeas. Cook for 2 to 4 minutes to allow flavors to blend, then take off the heat and hit with a squeeze of lime juice.
Make the cilantro pesto (I did this ahead as part of the food prep). Add the roasted cashews to a food processor and blitz until in small pieces. Add the cilantro, garlic, pepper, 2 tablespoons of lime juice, and salt. Blend until a paste forms, scraping down the sides as you go along.
With the motor running, stream in the olive oil to start to form a sauce. Scrape down the sides again, and stream in more oil as needed until you have a smooth yet thick texture. If the pesto is still not smooth enough but you don’t want to add more oil, add a spoon of water at a time until the sauce comes together. Taste the pesto, adding more lime juice as needed. Store the pesto in an airtight glass jar in the fridge for up to 5 days, or freeze up to 6 months.
Lightly char the tortillas (optional). Turn on an oven burner (or multiple burners) on medium-low. Place a tortilla on the burner. Allow the tortillas to char for about 30 seconds. Use tongs to check if they are somewhat charred underneath, then flip the tortillas until charred on the second side, 15 to 30 seconds. Adjust the heat as needed. (I’m more of a wimp here – wiped out my nonstick skillet and charred the tortillas in the skillet)
To assemble the tacos, spoon some cilantro pesto into the center of each tortilla. Add a handful of the spiced chickpeas. Top with diced avocado and salsa.
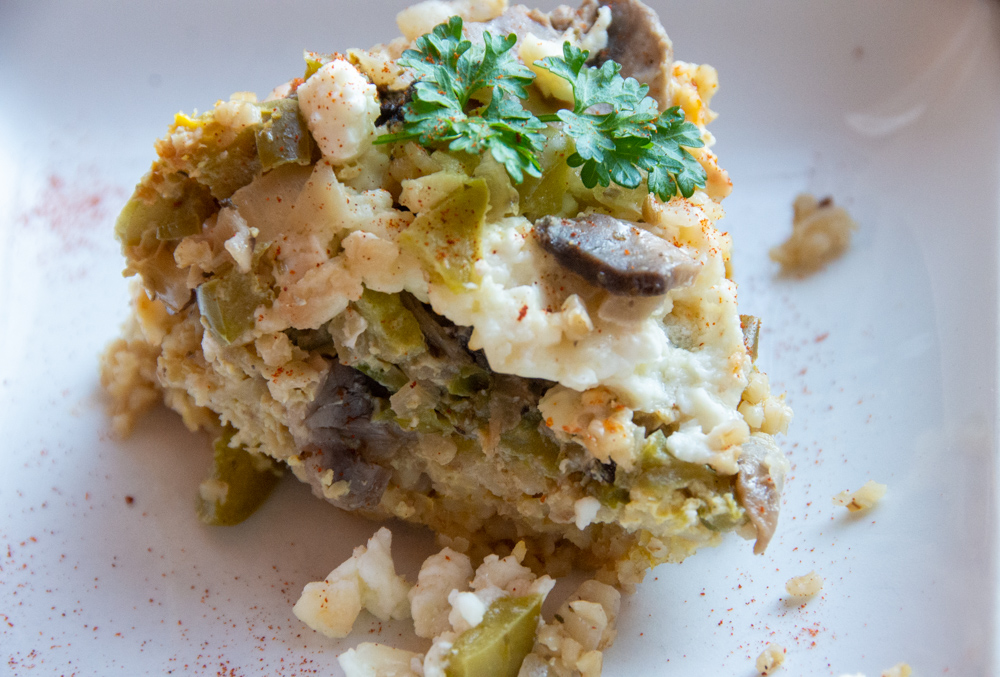
I wrote a reminder to myself in the margin of my trusty Moosewood Cookbook to make only half of this recipe. Am I ever sorry I did that! This was delicious and warming, and honestly, I’m sorry we don’t have more leftovers for lunch.
Bulgarian Pepper and Cheese Delight
Recipe edited, compiled and illustrated by Mollie Katzen in Moosewood Cookbook (1977 edition).
Ingredients – Group I:
4 c minced green peppers
1 1/2 c sliced mushrooms
1 1/2 c chopped onions
2-3 TBSP butter (I used coconut oil)
Ingredients – Group II:
1 1/2 TBSP Tamari
1 1/2 TBSP sherry
1 tsp majoram
1/2 – 1 tsp salt (to taste)
black pepper to taste
Ingredients – Group III
1 1/2 c raw bulgar soaked in 1 1/2 c boiling water (soak the bulgar for at least 15 minutes. It will still be crunchy, but this will allow it to absorb liquid from the other ingredients)
1 1/2 c cottage cheese
3/4 c feta cheese
4 beaten, slightly salted eggs
paprika
Method:
Sauté onions in butter (or in my case, coconut oil) until translucent. Add peppers and mushrooms. Combine to cook until peppers are just becoming tender. Remove from heat.
Add all of Group II to sautéed vegetables and mix well.
Crumble the feta cheese and combine with the cottage cheese.
Oil a 2-quart casserole or 9 x 13 baking pan. Spread in the bulgar, and cover it with a layer of vegetables.
Add the mixed cheeses, and spread them around as evenly as possible.
Pour the beaten eggs over everything and dust with paprika.
Bake in a 350 degree over for 40-45 minutes uncovered. Let stand for 10 minutes before serving.
Yesterday I discovered a roll of leftover almond paste in our freezer. “Leftover” from holiday baking and Italian Rainbow Cookies. Last December in my baking frenzy, I discovered I couldn’t purchase a pre-made roll of almond paste, I rolled my own. That was very satisfying, but I had quite a bit more paste than I could use, so I froze the remainder for “later”.
“Later” turned out to be yesterday. This recipe for Almond Cloud cookies, while gluten free, is not egg-free, so not for our granddaughter with an egg allergy. Still, the grown-ups enjoyed these, and with a little tweak (orange extract in place of almond extract), I could almost imagine a little after-dinner sweet in Italy.
Stir fry meals are not only easy to put together, they offer opportunities to change things up based on whatever is on hand. For example, the protein in this stir fry – although delicious with chicken thighs – could just as easily be tofu; the asparagus could also be substituted.
New York Time’s food contributor and cookbook author Ali Slagle recently published this recipe in the NYT Food column. For this homecook, any recipe can be adapted to what is in the fridge or freezer, particularly as we negotiate food supply shortages, that makes for a winner.
Recipe by Ali Slagle, New York Times Food Contributor
Ingredients
3 TBS honey
¾ tsp black pepper
Kosher salt
2 TBSP all-purpose flour
1 ½ tsp ground turmeric
1 pound boneless, skinless chicken thighs, cut into 1-inch pieces
1 TBSP coconut or canola oil (I used coconut oil)
12 ounces asparagus, trimmed and thinly sliced on an angle
1 tsp unseasoned rice vinegar or soy sauce (I used rice vinegar)
1 lime, cut into wedges (optional-as a garnish/finish)
Method
In a small bowl or measuring cup, stir together 1/4 cup water with the honey, pepper and 1/2 teaspoon salt; set honey mixture aside.
In a medium bowl, stir together the flour, turmeric and 1 teaspoon salt. Add the chicken and toss until coated. (I used a zip bag for this step)
In a medium (10-inch) nonstick skillet, heat the oil over medium-high. Add the chicken and cook until the turmeric is fragrant and the chicken is golden brown on both sides, 2 to 3 minutes per side.
Add the asparagus, season with salt, stir to combine and cook until crisp-tender, 1 to 2 minutes.
Add the honey mixture and cook, stirring, until the chicken is cooked through and the sauce has thickened, 2 to 3 minutes.
Remove from heat and stir in the vinegar, if using. Season to taste with salt and pepper.
Option: Serve with lime squeezed over top, if you like.
I didn’t set out to make Moosewood’s Mushroom Barley Soup today, but after I finished bread baking in the afternoon, it seemed like a better idea than my originally planned dinner. I spent a good part of Saturday baking Hi-Rise Bakery’s Corn Bread (recipe found in Maggie Glezer’s Artisan Baking Across America). No, not that kind of cornbread. This is one of the Cambridge bakery’s signature loaves which, to me is nearly perfect.
What could be better than a supper of warm, hot soups and fresh bread? I don’t know, but on this frigid New England evening, that’s what we went with, and I was glad we did!
Moosewood’s Mushroom-Barley soup has an appealing earthiness and is simple to pull together – just remember that it does take a little bit of time to cook the pearl barley. It is vegetarian, of course, but comforting and hearty.
Cook the barley in 1 1/2 cups of stock or water until tender. Cook it right in the soup kettle. (This took about 45-50 minutes on simmer – you may need to add additional water so keep your eye on things)
Add the remaining stock or water (about 5 cups), tamari and sherry.
Sauté the onions and garlic in butter. When they soften, add mushrooms and 1/2 tsp salt.
When all is tender, add to the barley, being sure to include the liquid the vegetables expressed while cooking.
Give it a generous grinding of black pepper and simmer 20 minutes, covered, over the lowest possible heat.
A goal for 2022 is to incorporate more vegan cooking into our rotation and to use our Instant Pot more frequently. This stew, billed as a “dump-and-go” was creamy and delicious and, most importantly easy to assemble. The only trick was remembering to soak the dried beans before cooking. Here’s where I skipped the direction for an overnight soaking. Instead, I started soaking the dried beans in the early morning – 8 hours later, the stew was ready to assemble.
Like many Instant Pot fans, I’ve found I can quickly prep a pot of dried beans and that little bit of effort is truly worth it. Canned beans can be quite good, but to me they don’t impart the creamy texture of dried beans cooked from scratch. An Instant Pot makes that ever-so-much-more easy.
This recipe comes from the website Rainbow Plant Life. Plan on about an hour’s cooking time so that the Instant Pot pressure can be released using natural release method.
12 ounces dried white beans, such as cannellini or great northern beans, soaked overnight (I opted for great northern beans)
3 medium shallots, diced
4 garlic cloves, chopped
3 celery ribs, sliced
1 large or 2 small-to-medium Yukon Gold potatoes, scrubbed, peeled, and grated
3 1/2 cups vegetable broth (the broth I used made this pretty salty – I’d opt for water or half water-half broth next time)
1 to 1-1/2 tsp ground cumin (use 1.5 tsp if you love cumin)
1 tsp sweet or hot paprika (I went with the hot)
Bouquet garni: 2 bay leaves + a few sprigs of flat-leaf parsley and thyme, tied tightly together with kitchen twine
1 ½ – 2 tsp kosher salt
Freshly cracked black pepper to taste
1 (14.5-oz) can crushed tomatoes
3 TBSP tomato paste
Ingredients for Gremolata topping
1 large handful of Italian flat-leaf parsley, leaves and stems
1 large garlic cloves, peeled and left whole
1 small FRESH lemon
Coarse or flaky sea salt
For serving (optional): fresh lemon juice, extra virgin olive oil, and crusty whole-grain bread
Method
Pour the vegetable broth into the Instant Pot. Add the soaked and drained white beans, shallots, garlic, celery, grated potatoes, cumin, paprika, salt, pepper, and the bouquet garni. Stir to combine.
Pour in the crushed tomatoes and scoop the tomato paste on top of the other ingredients, but do not stir in, allowing the tomatoes to sit on top (this prevents the tomatoes from blocking the Instant Pot’s heat sensory and burning).
Secure the lid and set the Pressure Release to Sealing. Select the Pressure Cook setting at high pressure and set the cook time to 12 minutes.
While the stew is cooking, prepare the Gremolata Topping. Roughly chop the parsley. Using a Microplane, grate the garlic directly over the parsley and zest the lemon on top of this mixture, taking care to not zest the white pith underneath the skin. Mix the garlic and lemon zest into the parsley and chop until everything is finely minced. Sprinkle with a bit of the coarse or flaky sea salt.
Once the 12-minute timer has completed and beeps, allow a natural pressure release (i.e, let it release without opening the valve to VENT).
Open the pot and taste for seasonings, adding more salt as needed. Transfer the stew to individual bowls, and top each with some gremolata. If desired, squeeze a little fresh lemon juice and drizzle with a bit of extra virgin olive oil, and serve with whole grain bread.
We are getting our first real snowfall of Winter 2022 today, so I decided to change things up a little by making our big meal for mid-day.
Food & Wine published this warming Winter-weather salad in 2013. The original recipe was developed by Nick Wilber and it ticks all the right boxes for a snowy day – warm, easy-to-acquire ingredients and filling. Link to the recipe below for more cooking suggestions AND a suggestion for a complementary wine pairing. Full disclosure: I cut the recipe in half because there are just two of us – a double-sized portion was more than enough as a main.
2 medium acorn squash (3 pounds)—scrubbed, halved, seeded and cut into 1/2-inch-thick wedges (Because our local grocer waxed the outside (!), I opted to peel the squash)
1 Golden Delicious apple—quartered, cored and sliced 1/4 inch thick
1/2 small head radicchio, leaves torn into small pieces
Parsley sprigs, for garnish
Method
In a large saucepan, heat 2 tablespoons of the olive oil. Add the shallot and cook over moderate heat, stirring, until lightly golden, about 5 minutes. Add the garlic and cook, stirring, until fragrant, 2 minutes.
Stir in the lentils, thyme and 3 cups of water and bring to a boil. Cover and simmer over low heat until the lentils are tender and all of the liquid has been absorbed, about 30 minutes.
Discard the thyme sprigs. Transfer the lentils to a medium bowl and let cool slightly. Stir in the lemon juice, 2 tablespoons of chives and remaining 1/4 cup of olive oil; season with salt and pepper.
Meanwhile, preheat the oven to 400°. In a small bowl, whisk the butter with the cinnamon, nutmeg and cloves; season with salt and pepper.
In a large bowl, toss the squash with 5 tablespoons of the spiced butter and season with salt and pepper. Arrange the squash on 2 baking sheets and roast for 10 minutes.
In the same bowl, toss the apple with the remaining 1 tablespoon of spiced butter. Turn the squash wedges and add the apples to the baking sheets. Roast for about 10 minutes longer, until the squash and apples are tender and golden.
Arrange the squash, apples and radicchio on a serving platter. Spoon the lentils on top and drizzle with olive oil. Garnish with parsley and chives and serve.
Late last month, I read about about Tweeter Brian Gorman who made a project of cooking as many recipes from Mollie Katzen‘s Moosewood Cookbook as possible . Just as I was thinking that would be an awesome plan for 2022, Mollie Katzen herself posted an encouragement to the Twitterverse:
Anyone want to do the same as Brian and go on a Moosewood Cookbook recipe bender for 2022? I’d be delighted to converse with you here along the way.
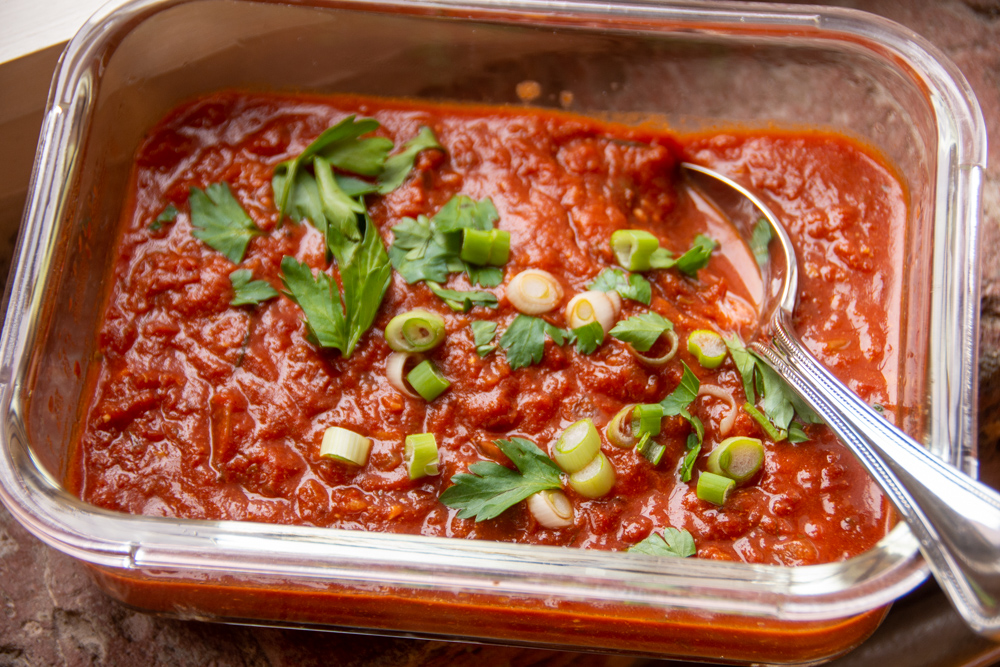
along with a request to tag posts and photos with #Moosewood2022. So here I am in the first days of 2022 posting a recipe from my revisit to a well-loved copy (copyright 1977!) of Moosewood: Spicy Tomato Soup (page 4).
Living in the New England tundra in January means our fresh tomatoes are usually hard nubs of something trucked in from a warmer climate – not great for the palate or for my carbon footprint. However, that logistical problem didn’t stop me from making this deliciously warming soup. I opened up a can of whole plum tomatoes, chopped them, and threw them into the pot. I’ll have to wait until August when our fresh tomatoes are abundantly available to make a taste comparison, but my initial thinking is, not bad.
After such a difficult December, it’s nice to have new challenges to look forward to and, for me, cooking at least one recipe a week from Moosewood is something I plan to do. Challenge accepted.
Ingredients:
1-1/2 c minced onion
3 cloves crushed garlic
1 TBSP butter
1 TBSP olive oil
1 tsp dill weed (I used fresh)
1/2 tsp (or more) black pepper
1 2-lb can of crushed, concentrated tomatoes plus 2 cups stock or water OR 6 cups chopped tomatoes plus their liquid (I used the crushed)
1 TBSP honey
1 TBSP mayonnaise or sour cream (I used nonfat Greek yogurt)
2 medium fresh tomatoes, chopped (used canned plums because it’s winter here)
yogurt, parsley and scallions for the topping
Method
Sauté onions and garlic with salt in combined olive oil and butter in a large kettle or large saucepan. Cook five minutes until translucent.
Add dill, pepper,tomatoes and honey.
Cover and simmer at least 45 minutes on low heat.
Five minutes before serving, whisk in mayonnaise or sour cream (or in my case, Greek yogurt). Taste to correct seasonings.
Serve hot, topped with yogurt, chopped parsley and scallions.
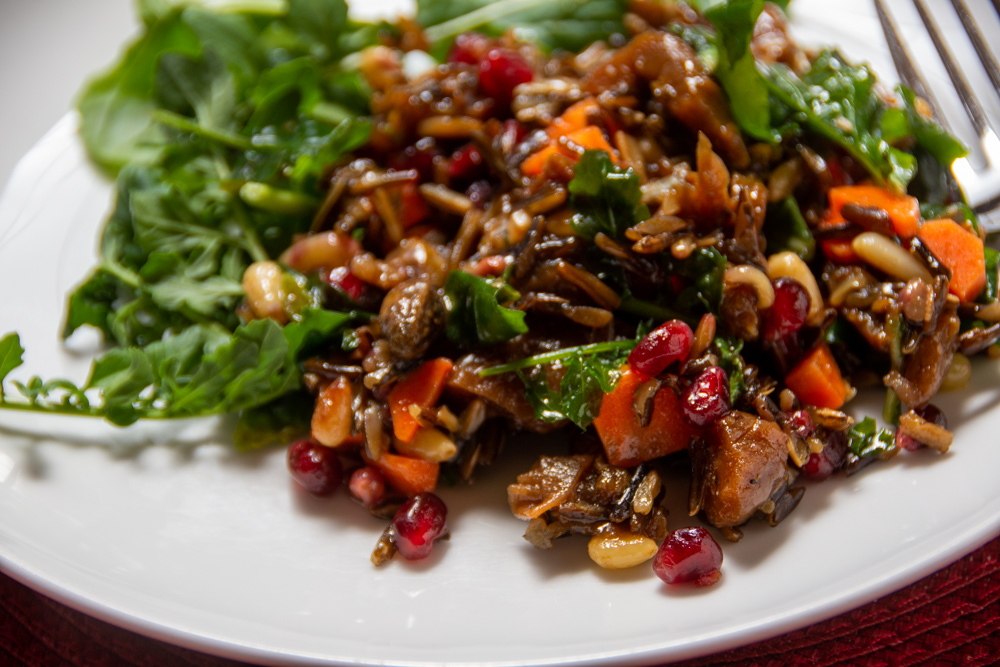
The Winter Solstice means our living space receives barely any light as the sun no longer is high enough in the sky to clear the brick walls of the re-purposed cotton factory in which we live. So, along with many others in New England, we needed a bit of brightness to remind ourselves that Winter can also be made light with some deep and beautiful colors. The clean taste of pomegranate seeds along with fresh mint and arugula brilliantly blended to create a perfect winter salad.
This salad recipe was adapted from the original developed by Laura Washburn in The Pressure Cooker Cookbook and is available from multiple vendors. The recipe found in the Washington Post was adapted by Stacy Zarin Goldberg.
Wild Rice, if not cooked thoroughly and correctly, can be pretty chewy and not in a good way, so it was interesting to (finally) learn how to adequately cook it using pressure cooking. While I’ve been informed that a pressure cooker has traditionally been a wedding gift of importance to many French brides, they’ve always frightened me. I’ve only recently become a fan of pressure cooking and followed the suggested cooking methods for an Instant Pot.
3 cups cold water (for InstantPot, use just 2 cups)
salt
black pepper
1/2 c pine nuts, toasted; may substitute shelled pistachios or pumpkin seeds (I used a mix of pine nuts and pistachios)
2 medium carrots, cut into 1/4-inch dice (about 3/4 c diced)
3 scallions, white and light-green parts, roughly chopped
Large handful fresh mint leaves
1 small bunch baby arugula (about 4 ounces or 3 1/2 to 4 loosely packed cups)
FOR THE DRESSING
1/4 c pomegranate molasses
1/4 c extra-virgin olive oil
2 large cloves garlic, crushed and finely chopped
Sea salt
Freshly ground black pepper
2/3 c fresh pomegranate seeds
Method
For the salad:
In a medium bowl, add the dried apricots (could substitute dried peaches or mangoes) and pour enough hot water over them to cover. Let soak for 10 minutes.
Combine the rice and water in the pressure cooker. Lock on the lid and bring to high pressure. Lower the heat slightly, but maintain high pressure, and cook for 22 minutes. To cool, use the quick-cool method suggested by the manufacturer of your pressure cooker; or place the pressure cooker in the sink at a slight angle and run cold water on the top of the cooker and down the side, being careful not to let any of the water run over the pressure-release vent or valve. When cool, unlock and remove the lid, taking care to avoid any steam that is released as you open the cooker.
OR
If using an Instant Pot (I did) to make the rice, pour 2 cups water into the Instant Pot; then add the 1 cup of rice. Make sure the steam valve is sealed. Select PRESSURE (HIGH) and set to 28 minutes. (It takes about 10 minutes for the appliance to come to pressure before cooking begins.) Release the pressure manually by moving the pressure-release handle to “Venting,” covering your hand with a towel or hot pad. Never put your hands or face near the vent when releasing steam. Drain the rice, if necessary. Otherwise, fluff the rice and proceed as directed.
Pour the rice into a fine-mesh strainer and rinse under cold water. Allow it to drain, then season with salt and pepper to taste. Transfer to a large mixing bowl.
Drain the soaked apricots, peaches or mangoes and roughly chop. Add to the rice along with the pine nuts, carrots, scallions, mint and arugula.
For the dressing:
In a medium bowl, whisk together the pomegranate molasses, olive oil, garlic, and salt and pepper to taste. Stir in the pomegranate seeds.
Pour over the rice-vegetable mixture and toss to coat the salad evenly with the dressing.