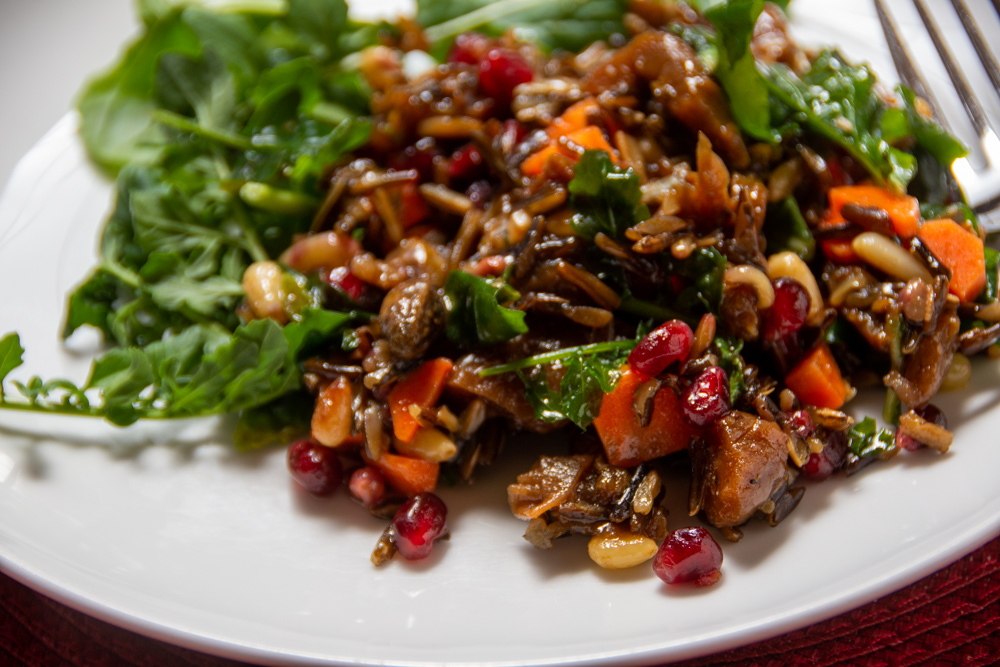
• The Winter Solstice means our living space receives barely any light as the sun no longer is high enough in the sky to clear the brick walls of the re-purposed cotton factory in which we live. So, along with many others in New England, we needed a bit of brightness to remind ourselves that Winter can also be made light with some deep and beautiful colors. The clean taste of pomegranate seeds along with fresh mint and arugula brilliantly blended to create a perfect winter salad.

    This salad recipe was adapted from the original developed by Laura Washburn in The Pressure Cooker Cookbook and is available from multiple vendors. The recipe found in the Washington Post was adapted by Stacy Zarin Goldberg.

    Wild Rice, if not cooked thoroughly and correctly, can be pretty chewy and not in a good way, so it was interesting to (finally) learn how to adequately cook it using pressure cooking. While I’ve been informed that a pressure cooker has traditionally been a wedding gift of importance to many French brides, they’ve always frightened me. I’ve only recently become a fan of pressure cooking and followed the suggested cooking methods for an Instant Pot.

    Wild Rice, Mint, and Pomegranate Salad

    Adapted by Stacy Zarin Goldberg, Washington Post

    Ingredients

    FOR THE SALAD

    • 2/3 c soft dried apricots, peaches or mangoes
    • 2/3 c uncooked wild rice (4 ounces package)
    • 3 cups cold water (for InstantPot, use just 2 cups)
    • salt
    • black pepper
    • 1/2 c pine nuts, toasted; may substitute shelled pistachios or pumpkin seeds (I used a mix of pine nuts and pistachios)
    • 2 medium carrots, cut into 1/4-inch dice (about 3/4 c diced)
    • 3 scallions, white and light-green parts, roughly chopped
    • Large handful fresh mint leaves
    • 1 small bunch baby arugula (about 4 ounces or 3 1/2 to 4 loosely packed cups)

    FOR THE DRESSING

    • 1/4 c pomegranate molasses
    • 1/4 c extra-virgin olive oil
    • 2 large cloves garlic, crushed and finely chopped
    • Sea salt
    • Freshly ground black pepper
    • 2/3 c fresh pomegranate seeds

    Method

    For the salad:

    In a medium bowl, add the dried apricots (could substitute dried peaches or mangoes) and pour enough hot water over them to cover. Let soak for 10 minutes.

    Combine the rice and water in the pressure cooker. Lock on the lid and bring to high pressure. Lower the heat slightly, but maintain high pressure, and cook for 22 minutes. To cool, use the quick-cool method suggested by the manufacturer of your pressure cooker; or place the pressure cooker in the sink at a slight angle and run cold water on the top of the cooker and down the side, being careful not to let any of the water run over the pressure-release vent or valve. When cool, unlock and remove the lid, taking care to avoid any steam that is released as you open the cooker.

    OR

    If using an Instant Pot (I did) to make the rice, pour 2 cups water into the Instant Pot; then add the 1 cup of rice. Make sure the steam valve is sealed. Select PRESSURE (HIGH) and set to 28 minutes. (It takes about 10 minutes for the appliance to come to pressure before cooking begins.) Release the pressure manually by moving the pressure-release handle to “Venting,” covering your hand with a towel or hot pad. Never put your hands or face near the vent when releasing steam. Drain the rice, if necessary. Otherwise, fluff the rice and proceed as directed.

    Pour the rice into a fine-mesh strainer and rinse under cold water. Allow it to drain, then season with salt and pepper to taste. Transfer to a large mixing bowl.

    Drain the soaked apricots, peaches or mangoes and roughly chop. Add to the rice along with the pine nuts, carrots, scallions, mint and arugula.

    For the dressing:

    In a medium bowl, whisk together the pomegranate molasses, olive oil, garlic, and salt and pepper to taste. Stir in the pomegranate seeds.

    Pour over the rice-vegetable mixture and toss to coat the salad evenly with the dressing.

  • Until this year, I don’t recall ever attempting a swirl cookie. They’re not a simple cut-out or drop, so the intimidation factor was high. This recipe from Alton Brown, however, was too delicious sounding to prevent me from giving it a try, and frankly, it was a bit of a challenge to get the dough close to just right, but the finished cookie lived up to its hype. Will I make these again? You bet.

    Chocolate Peppermint Pinwheel Cookies

    Recipe from Alton Brown, Food Network TV

    Sugar Cookie Base Ingredients

    • 3 c all-purpose flour
    • 3/4 tsp baking powder
    • 1/4 tsp salt
    • 1 c unsalted butter, softened
    • 1 c sugar
    • 1 egg, beaten
    • 1 TBSP milk
    • Powdered sugar, for rolling out dough (using confectionary sugar for rolling was a first for me, great idea)

    Sugar Cookie Base Method

    1. Sift together flour, baking powder, and salt. Set aside.
    2. Place butter and sugar in large bowl of electric stand mixer and beat until light in color. Add egg and milk and beat to combine.
    3. Put mixer on low speed, gradually add flour, and beat until mixture pulls away from the side of the bowl.
    4. Divide the dough in half, wrap in waxed paper, and refrigerate for 2 hours.

    Pinwheel Cookie Ingredients

    • 1 batch Sugar Cookies
    • 3 ounces unsweetened chocolate, melted
    • 1 tsp vanilla extract
    • 1 egg yolk
    • 1 tsp peppermint extract
    • 1/2 c crushed candy canes or peppermint candies

    Pinwheel Cookie Method

    1. Divide the dough in half.
    2. Add chocolate and vanilla to 1 half and incorporate with hands.
    3. Add egg yolk, peppermint extract, and crushed candy to other half of dough and incorporate with hands.
    4. Cover both with plastic and chill for approximately 5 minutes. Roll out doughs separately to approximately 1/4-inch thickness.
    5. Place peppermint dough on top of chocolate and press together around the edges. Using waxed paper or flexible cutting board underneath, roll dough into log. Wrap in waxed paper and refrigerate for 2 hours. (yes, 2 hours, do not skip this)
    6. Preheat oven to 375 degrees F.
    7. Remove dough from the refrigerator and cut into 1/2-inch slices.
    8. Place cookies 1-inch apart on greased baking sheet, parchment, or silicone baking mat (I used parchment) and bake for 12 to 13 minutes, rotating the pan halfway through cooking time.
    9. Remove from oven and let sit on baking sheet for 2 minutes, then move to a wire rack to cool completely. Store in an airtight container for up to 1 week.

  • My Italian ancestry (Sicilian really, no surprise there) dictates that every Christmas holiday I made at least one biscotti recipe. As I’ve written before, I’ve got the baking part down to a personal science, and I often ignore the baking directions on a particular biscotti recipe. For me, the best bake comes from a usual first bake of 25 minutes at 350 F, a 5-minute cool down, and a 10 minute (or so) second bake with the biscotti standing upright. I’ve baked these cookies this way for a long while, and so while I share the directions as written, full disclosure: I bake them my way.

    This Christmas I looked for a spicy biscotti that I could rotate in – coffee, chocolate, pistachio, citrus – all delicious, but to me the holidays need a little spicing up. And this discover from Amanda Neal of Food Network fit the bill.

    Gingerbread Biscotti

    Amanda Neal, Food Network Kitchen

    Ingredients

    • 1 3/4 cups all-purpose flour
    • 2/3 cup granulated sugar
    • 2 1/2 tsp gingerbread spice (I used King Arthur Baking Gingerbread Spice or make your own here)
    • 1/2 tsp baking powder
    • 1/2 tsp kosher salt
    • 4 TBSP unsalted butter, at room temperature
    • 2 TBSP molasses
    • 1 tsp pure vanilla extract
    • 2 large eggs
    • 2 4-ounce bars white chocolate, chopped
    • 1 TBSP coconut oil or vegetable shortening
    • White sanding sugar (for decorating)

    Method

    1. Preheat the oven to 350 degrees F. Line a rimmed baking sheet with parchment.
    2. Pulse the flour, granulated sugar, gingerbread spice, baking powder and salt in a food processor until combined. Add the butter and pulse until the butter is thoroughly combined with the dry ingredients and the mixture looks sandy. Transfer to a large bowl. 
    3. Whisk together the molasses, vanilla, eggs and 1 tablespoon water in a small bowl; stir into the flour mixture until a crumbly dough forms. Press together and knead into a moist, uniform dough. 
    4. Divide the dough in half and place on the prepared baking sheet. Shape the dough into two 10-by-2-inch logs, keeping 3 inches between the logs. If the dough is sticky, splash a couple drops of water on your hands and continue shaping. Bake until the outside is set but the inside is still slightly soft, about 30 minutes. 
    5. Let cool for 5 minutes on the baking sheet. Transfer the logs to a cutting board and slice 1/2 inch thick on the bias with a serrated knife. Return the slices to the baking sheet, slat-side down, and bake, flipping the slices halfway through, until crisp, 20 to 25 minutes. Transfer the biscotti to a wire rack to cool.  (This is where I use my stand-by baking method)
    6. Once the biscotti are cool, combine the white chocolate and oil in a medium microwave-safe bowl. Microwave on high in 30-second increments, stirring occasionally, until melted and smooth, about 1 1/2 minutes total. Dip half of each biscotti at an angle in the white chocolate, letting the excess drip off. Return to the wire rack, then refrigerate until just set, about 5 minutes.  
    7. Pour the remaining white chocolate mixture into a small piping bag or resealable bag, then snip the tip or corner with kitchen shears to create a small hole. Drizzle the white chocolate at an angle across the dipped end of each biscotti, drizzling in the opposite direction to create a crisscross pattern.
    8. Return to the wire rack, then sprinkle with sanding sugar. Refrigerate until all the chocolate is completely set, about 10 minutes.
    9. The biscotti can be stored in an airtight container for up to 1 week.  
  • Like many home cooks, I fall into routines and habits that are easy and comfortable. One piece of kitchen equipment that I had been using fairly regularly throughout the spring and summer, my Instant Pot, recently had been sitting idly in a cupboard for the last several weeks. So when I was meal planning last week, I went in search of an Instant Pot recipe that I could throw into the rotation. Skinny Taste, one of the best recipe sites I found, has many Instant Pot recipes and – bonus – each recipe on the website lists nutrition information. For me, at this time of year, it is important to keep tabs on what I’m consuming in order to avoid overeating.

    This was a tasty and warming dish on a cold December night, one that I’ll no doubt go back to many times. I stay away from full fat coconut milk as a personal choice, substituting the lower fat product, which I don’t believe made a difference in taste.

    Instant Pot Chicken Tikka Masala with Cauliflower and Peas

    Recipe and Nutrition Info from Gina Homolka of Skinny Taste

    Ingredients

    • 1-1/2 pounds skinless, boneless chicken thighs, cubed
    • 1 1/2 tsp kosher salt
    • 1/2 TBSP ghee, butter or coconut oil for df (I used coconut oil)
    • 1/2 chopped onion
    • 3 cloves garlic, minced
    • 1 tsp grated ginger root (fresh – not the powder!)
    • 1 tsp ground coriander
    • 1 tsp cumin
    • 1/2 tsp turmeric
    • 1/2 tsp garam masala
    • 1/4 tsp cayenne pepper
    • 1/4 tsp ground cardamom
    • 14 ounce can diced tomatoes, drained
    • 2 C cauliflower florets
    • 1/2 C frozen peas
    • 1/2 C full fat canned coconut milk (I used low fat)
    • 1/4 C fresh cilantro leaves, for serving

    Method

    1. Season chicken with 1 teaspoon salt.
    2. Press saute button on Instant Pot and melt the butter,
    3. Add onion, garlic, ginger and 6 spices (from coriander to cardamom) and saute until the vegetables are soft and the spices are fragrant, about 2 to 3 minutes.
    4. Add the tomatoes and use an immersion to blend until smooth (or blend in the blender) (here’s where I just mashed up the diced tomatoes a bit with a fork – I kind of liked the chunckiness).
    5. Add the chicken, remaining 1/2 teaspoon salt and stir, cook high pressure 15 minutes. (You may need to add about 1/4-1/2 cup of liquid to the Instant Pot so there’s plenty of liquid – refer to your Instant Pot’s cooking instructions)
    6. Quick release.
    7. Add the cauliflower and peas and cook 2 minutes on high pressure.
    8. Quick release, stir in coconut milk and serve garnished with cilantro.

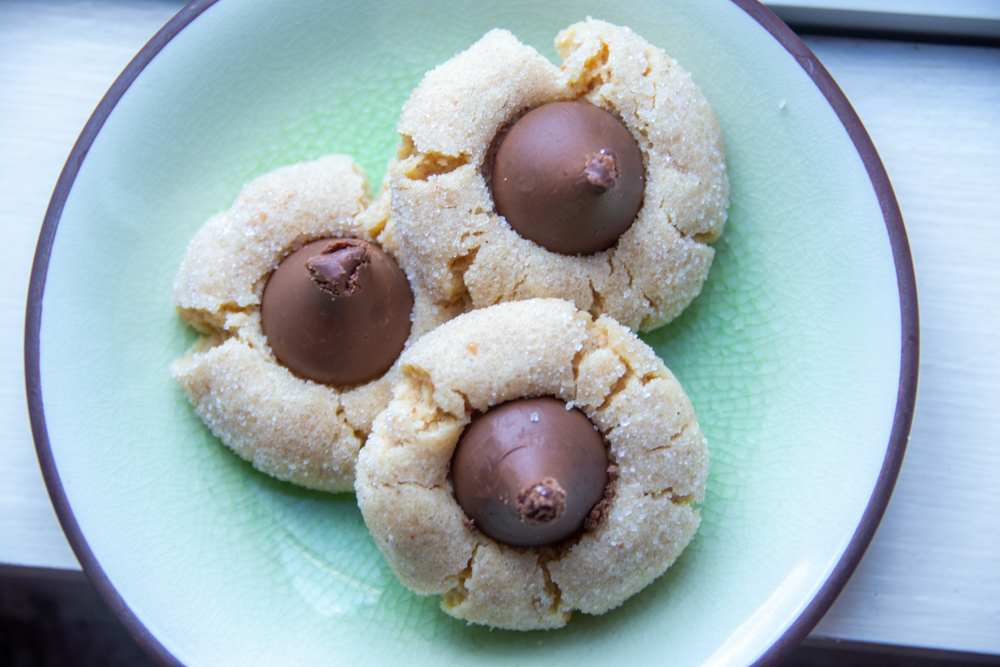
  • These peanut butter cookies have been a family cookie tradition for a lot of years and, honestly, they never get tired! Bakers can find a ton of “variations” on the original out there; in fact this recipe was recently published in the New York Times and adapted from the Gerraro Family.

    The version I first remember baking came from a Pillsbury Bake-Off “cookbook” which was in reality a collection of winning recipes from the Pillsbury Bake-Off for a particular year. The Internet – which of course never lies – tells me Peanut Butter Blossoms was one of the 1957 winners. Now I wasn’t old enough to be baking cookies in 1957, but it wouldn’t surprise me that my Mom or Grandmother had this cookbook in their possession. Originally called Black-Eyed Susans by Bake-Off Winner Freda Strasel Smith, Pillsbury changed the name to Peanut Butter Blossom when the recipe was published. No matter what they are called, they are delicious!

    Peanut Butter Blossoms

    Recipe adapted by the New York Times from a Gerraro Family Recipe

    Ingredients

    • 1 ¾ cups all-purpose flour
    • 1 tsp baking soda
    • ½ tsp salt
    • 1 stick butter, at room temperature
    • ½ cup smooth peanut butter
    • ½ cup granulated sugar, plus more for rolling
    • ½ cup light brown sugar
    • 1 large egg
    • 1 TBSP milk
    • 1 tsp vanilla
    •  Nonstick spray or vegetable oil for cookie sheet (optional) (I used baking parchment)
    • 5 dozen Hershey’s Kisses, foil removed

    Method

    1. Sift together flour, baking soda and salt; set aside.
    2. Using an electric mixer, cream together butter, peanut butter, 1/2 cup granulated sugar and light brown sugar.
    3. Add egg, milk and vanilla; beat until well blended. Gradually add flour mixture, mixing thoroughly. If the dough is very soft, refrigerate for about 1 hour (this is an important step!).
    4. Preheat oven to 375 degrees. Spray, oil or line a cookie sheet with nonstick liner and set aside.
    5. Roll dough into 1-inch balls.
    6. Roll cookies in sugar and place 2 inches apart on cookie sheet.
    7. Bake until very light brown and puffed, 6 to 8 minutes. Remove sheet from oven and lightly press a candy kiss into center of each cookie, allowing it to crack slightly.
    8. Return to oven until light golden brown, 2 to 3 minutes.
    9. Remove from oven, cool completely and store in an airtight container.
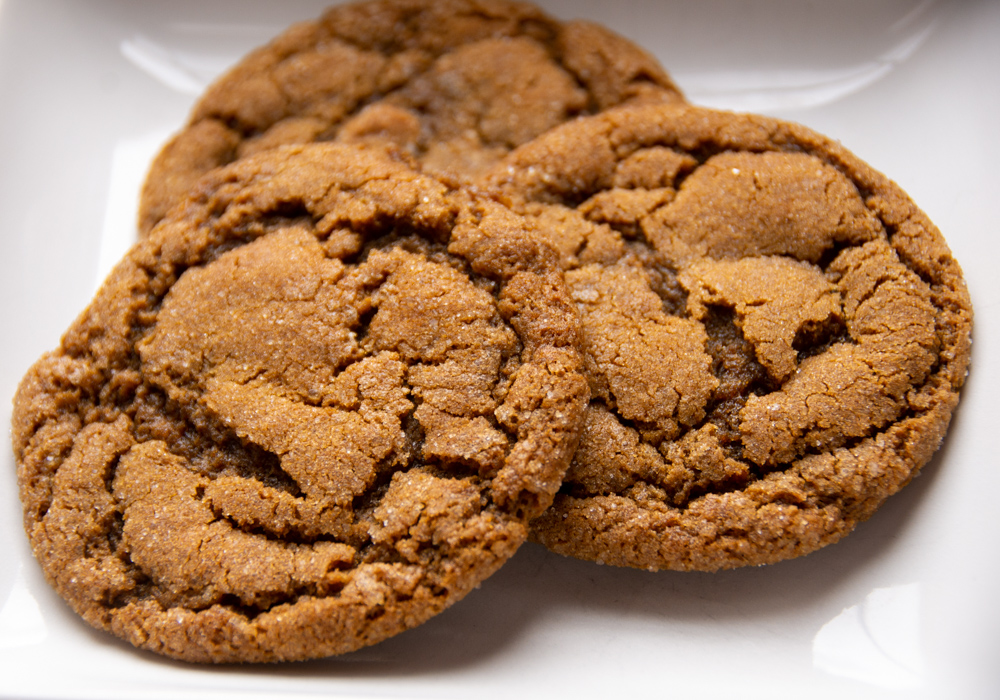
  • Now that we’ve passed Thanksgiving, the Holiday Baking season has begun in earnest in our kitchen. As our granddaughter has an egg allergy, we are always on the hunt for egg-free recipes and this one from Kelly Rudnicki, author of The Food Allergy Mama’s Baking Book, was a hit. In addition to the usual ball shaped cookies, I was able to roll out a well-chilled portion of dough and shape cut-outs for our traditional cookie decorating tradition with our granddaughter. Baking without eggs can be challenging, but this delicious cookie proves it can be delicious and safe for those with food allergies.

    Dairy- and Egg-Free Molasses Cookies

    by Kelly Rudnicki, contributor to Marthastewart.com

    Ingredients

    Ingredients

    • 3/4 cup dairy-free shortening 
    • 1 cup packed light-brown sugar 
    • 1/4 cup unsweetened applesauce 
    • 1/4 cup molasses 
    • 2 1/2 cups unbleached all-purpose flour 
    • 2 teaspoons baking soda 
    • 1 teaspoon ground cinnamon 
    • 1 teaspoon ground ginger 
    • 1/4 teaspoon ground cloves 
    • 1/8 teaspoon salt 
    • 1/2 cup granulated sugar, for coating

    Method

    Directions

    1. Using an electric mixer fitted with the paddle attachment, mix together shortening, brown sugar, applesauce, and molasses until well combined.
    2. In a medium bowl, whisk together flour, baking soda, cinnamon, ginger, cloves, and salt.
    3. Slowly add flour mixture to shortening mixture; mix until combined.
    4. Transfer dough to refrigerator and let chill for 1 hour.
    5. Preheat oven to 375 degrees. Line a baking sheet with parchment paper; set aside.
    6. Form dough into 1-inch balls. *
    7. Place granulated sugar in a shallow dish; roll each ball in sugar. Place on prepared baking sheet and sprinkle a few drops of water onto each ball using your fingers.
    8. Bake until lightly browned, 12 to 14 minutes.
    9. Let cookies cool completely on baking sheet before serving.

    * rolling this soft dough to form cutouts is a challenge but it can be done as long as the dough stays very cold and the rolling surface is well floured. The best cutters to use are those that are medium-sized and fairly simply shaped.

  • If you’ve not been perusing the website, SkinnyTaste, you’ve been missing out on some incredibly delicious recipes. This one popped up when I was looking for a good, solid vegetarian black bean chili, and with the addition of a spicy yogurt topping, it did not disappoint. This recipe comes together in short order, a feature one can’t under-value during these busy weeks!

    The recipe posting has many tips for variations and, as we are just a household of empty-nesters, the ability to scale up or down was a feature.

    Skinny Taste’s Easy Black Bean Chili with Spiced Yogurt

    Ingredients (This is the website version which serves 6)

    Spice Mix:
    • 1 1/4 tablespoon cumin
    • 1 1/4 tablespoon chili powder
    • 1/4 teaspoon garlic powder
    • 1/4 teaspoon onion powder
    • 1/2 teaspoon smoked paprika
    • 1 teaspoon kosher salt
    Chili:
    • 3/4 cup  whole milk plain yogurt (I used 0% Greek yogurt here)
    • 2 15 oz cans black beans
    • 1 tablespoon olive oil
    • 1 medium onion, chopped
    • 1 red bell pepper, chopped
    • 1 diced jalapeno, plus more for garnish (fresh, not canned)
    • 10 oz can rotel tomatoes with green chilies
    • 8 ounces frozen corn
    • 8 ounce can tomato sauce
    • 3/4 cup less-sodium vegetable broth
    • Optional Toppings: shredded cheddar, diced red onions, cilantro, diced avocado (all of the above – delicious!)

    Method:

    1. Mix the spices in a small bowl. Set aside 1 1/2 teaspoons and mix into the yogurt. Set aside.
    2. Place 1 can of beans, not drained in the blender with 1/2 cup of water and puree. Drain the second can.
    3. Add oil to a large pot over medium heat, add the onions, bell pepper and jalapeno and cook 3 to 4 minutes.
    4. Add tomatoes, corn, beans, pureed beans, tomato sauce, vegetable broth and remaining spices.
    5. Bring to a boil, cover and simmer about 15 minutes, stirring until thickened.
    6. Serve topped with spiced yogurt plus your favorite optional toppings.

    For Noomers: Serving: 1 generous cup:

    Calories: 264kcal, Carbohydrates: 44.5g, Protein: 14.5g, Fat: 4.5g, Saturated Fat: 1g, Cholesterol: 44.5mg, Sodium: 889.5mg, Fiber: 14g, Sugar: 9g 

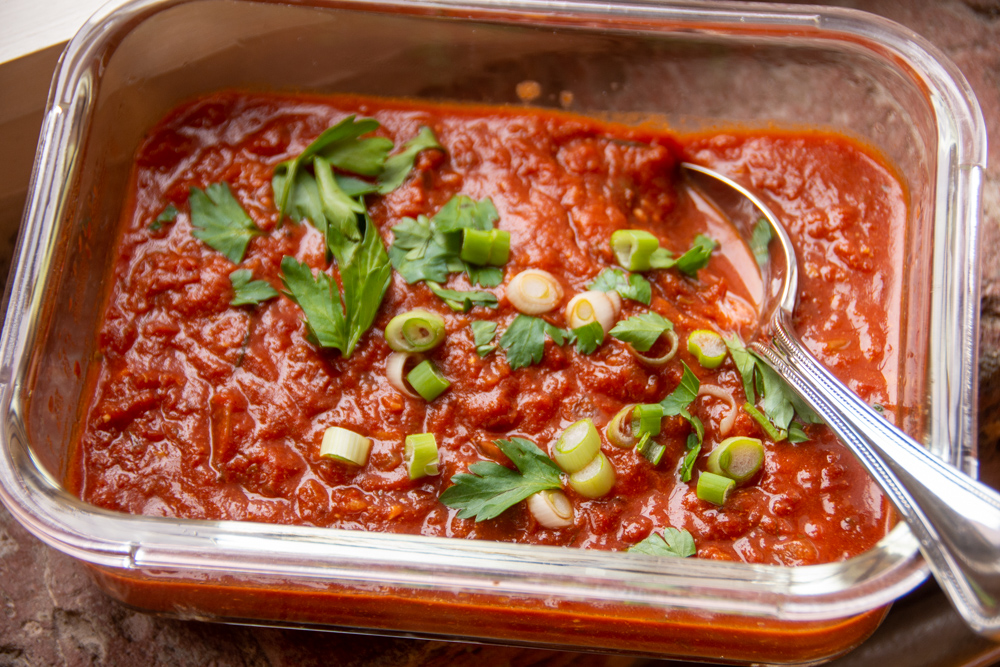
  • It’s soup weather!

    When I make cauliflower soups, I never think of creamy soups with a milk base. Adding tomato to this soup base was genius – something I had previously not thought of trying. After tasting this recipe, I’ll definitely correct that omission.

    With a tomato-based broth and the addition of coconut milk, this warming soup was reminiscent of a delicious Indian curry. It made at least 8 servings which meant we have enough to put aside in the freezer for another evening meal. I’ll admit to a couple of short cuts that did not seem to impact the quality – one being that I used frozen cauliflower florets (slightly thawed before roasting), and to cut back on sodium, I used water in place of a vegetable broth.

    Roasted Cauliflower & Potato Curry Soup

    Danielle Centoni, Eating Well Magazine

    Ingredients

    • 2 teaspoons ground coriander
    •  2 teaspoons ground cumin 
    • 1 ½ teaspoons ground cinnamon 
    • 1 ½ teaspoons ground turmeric 
    • 1 ¼ teaspoons salt ¾ teaspoon ground pepper 
    • ⅛ teaspoon cayenne pepper 
    • 1 small head cauliflower, cut into small florets (about 6 cups) [I used frozen
    • 2 tablespoons extra-virgin olive oil, divided 
    • 1 large onion, chopped 
    • 1 cup diced carrot 
    • 3 large cloves garlic,
    • minced 1 ½ teaspoons grated fresh ginger [FRESH ginger, not the powder please]
    • 1 fresh red chile pepper, minced, plus more for garnish 
    • 1 (14 ounce) can no-salt-added tomato sauce 
    • 4 cups low-sodium vegetable broth 
    • 3 cups diced peeled russet potatoes (1/2-inch) 
    • 3 cups diced peeled sweet potatoes (1/2-inch) 
    • 2 teaspoons lime zest 
    • 2 tablespoons lime juice 
    • 1 (14 ounce) can coconut milk 
    • Chopped fresh cilantro for garnish

    Method

    1. Preheat oven to 450 degrees F.
    2. Combine coriander, cumin, cinnamon, turmeric, salt, pepper and cayenne in a small bowl.
    3. Toss cauliflower with 1 tablespoon oil in a large bowl, sprinkle with 1 tablespoon of the spice mixture and toss again. Spread in a single layer on a rimmed baking sheet. Roast the cauliflower until the edges are browned, 15 to 20 minutes. Set aside.
    4. Meanwhile, heat the remaining 1 tablespoon oil in a large pot over medium-high heat. Add onion and carrot and cook, stirring often, until starting to brown, 3 to 4 minutes. Reduce heat to medium and continue cooking, stirring often, until the onion is soft, 3 to 4 minutes.
    5. Add garlic, ginger, chile and the remaining spice mixture. Cook, stirring, for 1 minute more.
    6. Stir in tomato sauce, scraping up any browned bits, and simmer for 1 minute.
    7. Add broth, potatoes, sweet potatoes, lime zest and juice. Cover and bring to a boil over high heat. Reduce heat to maintain a gentle simmer and cook, partially covered and stirring occasionally, until the vegetables are tender, 35 to 40 minutes.
    8. Stir in coconut milk and the roasted cauliflower. Return to a simmer to heat through.
    9. Serve garnished with cilantro and chiles, if desired.

    Fellow-Noomers, this is less than 300 calories per 1 1/2 cup serving (full nutrition on the original recipe site)

  • Last week, I used buttermilk in a casserole, but then had a significant amount leftover. What do you do with almost an entire quart of buttermilk? I started by trolling the Internet for a few ideas and found this bread recipe on Butter with a Side of Bread.

    The breads I bake tend toward whole grains and sour doughs, so this was a different kind of recipe than we are used to. What came from the oven was a hugely fragrant and soft loaf with a hint of tang which reminded me of dinner rolls. Delicious – and a quick and simple bake!

    If serendipity again leaves most of a quart of leftover buttermilk in my refrigerator, I know what I’ll do to make good use of it. Homemade Buttermilk Bread is a winner!

    Homemade buttermilk bread

    Recipe from Butter with a Side of Bread.

    Ingredients

    • 1 1/2 cups buttermilk (can simulate this by adding lemon juice to regular milk in a pinch)
    • 2 TBSP melted butter (I used a neutral oil)
    • 2 TBSP sugar
    • 1 tsp salt
    • 3 1/2 cups AP or bread flour (I used bread flour)
    • 1 TBSP yeast

    Method

    1. Combine buttermilk, butter and sugar in a mixing bowl.
    2. In a separate bowl (I used my mixer with dough hook), combine the dry ingredients including the yeast. Whisk together to combine.
    3. Now add the buttermilk mixture. Mix to combine (adjust liquids or dry ingredients to make the right consistency for bread dough).
    4. Mix the dough on low for 6-7 minutes or knead by hand for 10 minutes. This is critical.
    5. Cover the dough and let rise in a warm place (oven proofing settings are great) for about 1 hour until the dough is doubled in size.
    6. Punch down dough and knead several times. Shape into a loaf and place into a greased loaf pan. Cover and return the dough to a warm spot to rise for another 30-45 minutes.
    7. Preheat the over to 350 degrees Fahrenheit. Bake dough for 30-35 minutes until the top is golden brown. Cool and slice.

  • Same Cook, Different Book: Mollie Katzen’s Mushroom Yogurt Pie with Spinach Crust

    Cookbook author, illustrator, cook. Mollie Katzen has been and continues to be a multi-talented culinary force. Whenever I’m looking to try something plant-based and new, her many cookbooks are invaluable. I was recently reminded of this wonderful yogurt and mushroom-based pie found in The Enchanted Broccoli Forest originally released in 1995 and revised in 2000.

    As I had no wheat germ on hand, I substituted 1/4 cup of ground flax seeds for the 3/4 cup wheat germ. I feel that as flax can sometimes have a strong taste, that worked for me. I also used 0% Greek yogurt as that’s what I had on hand.

    No matter whether you stay true to the original or tweak things a bit to accommodate what’s in your kitchen stores, this pie is a keeper.

    Mollie Katzen’s Mushroom Yogurt Pie with Spinach Crust

    Katzen, M. The Enchanted Broccoli Forest. (2000). Berkeley, CA: Ten Speed Press.

    Ingredients

    For the Spinach Crust

    • 3/4 pound (12 oz) spinach, chopped very fine
    • 3 tablespoons butter
    • 3/4 cup unbleached white flour
    • 3/4 cup wheat germ (I substituted 1/4 cup ground flax seeds)
    • 1/4 teaspoon salt
    • Dash of nutmeg

    For the Mushroom Yogurt Pie Filling

    • 1 Spinach crust (above)
    • 1 tablespoon butter
    • 1 cup minced onion
    • 1/2 teaspoon salt
    • 12 ounces mushrooms, sliced
    • 2 tablespoons fresh lemon juice
    • 3 tablespoons flour (white or whole wheat)
    • 1 egg (at room temperature)
    • 1 cup firm yogurt (at room temperature) (I used Greek-style, 0% Fat)
    • 1/2 cup grated cheddar
    • 1/4 cup freshly minced parsley
    • Lots of fresh black pepper
    • Extra cheddar (for the top)
    • Paprika (for the top)

    Method

    For the Spinach Crust

    1. Preheat the oven to 375° F. 
    2. Melt the butter in a cast-iron skillet (I used a regular skillet that can stand high heat), add the spinach, and cook it quickly over fairly high heat, stirring, until it is just limp.
    3. Remove from heat, add remaining ingredients, and mix well.
    4. Pat into a buttered 9-inch pie pan. Use a fork first, then your fingers, to mold the crust. Pre-bake for 15 minutes at 375° F.

    For the Mushroom Yogurt Filling and Finishing

    1. Preheat the oven to 350° F. 
    2. In a large, heavy skillet, cook the onions in butter with salt, until the onions are soft (5 to 8 minutes). 
    3. Add the mushrooms and the lemon juice. Cook, stirring, over medium heat, about 5 to 8 more minutes.
    4. Gradually, as you stir, sprinkle in the flour. Keep cooking and stirring over medium-low heat another 8 to 10 minutes. Remove from heat. 
    5. Beat together the egg, yogurt, pepper, cheddar, and parsley. Stir the mushroom saute into this mixture, then beat it well.
    6. Turn the filling into the pre-baked crust (you don’t need to cool the crust first). Top with extra cheese and paprika. 
    7. Bake for 30 minutes at 350° F.